Top 10 Cable Organisers for Travel
Ten genuine electronics pouches compared by usable space, opening style and access in a cramped cabin seat.
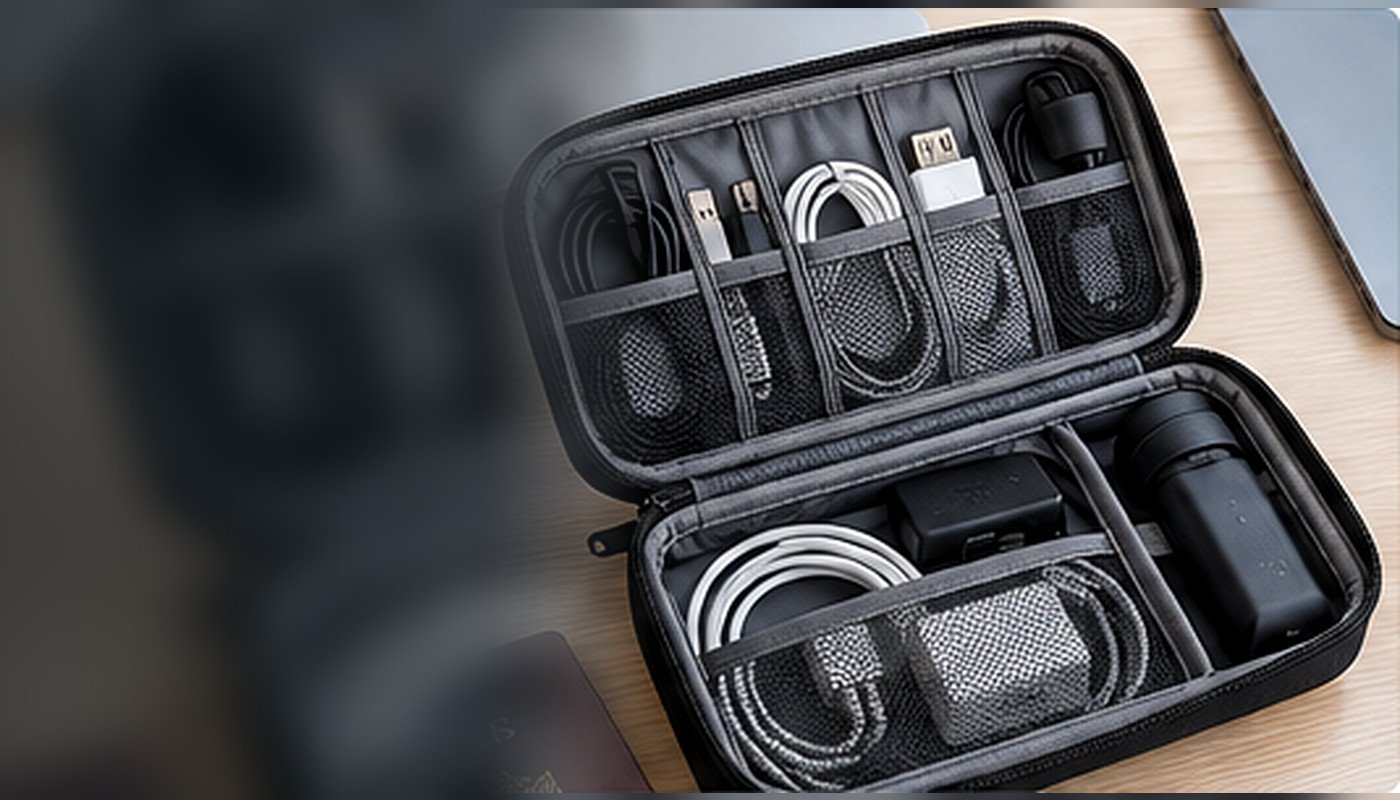
The best cable organisers for travel do not necessarily have the most pockets. A slim kit that holds your actual charger, charging lead, adapter and earbuds without bulging can be more useful than a handsome, rigid pouch that steals half the space in your personal item. This comparison is concerned with what happens when you need to reach a USB-C lead halfway through a flight, find a plug beside a hotel bed or repack quickly before a train.
I compared manufacturers’ descriptions and published dimensions, not personal test samples. Every pick has a distinct fit or access advantage and a meaningful compromise. Products and variants can change, so check the linked maker page before buying; an Amazon search link, where shown, is a separately labelled retailer search rather than a claim of confirmed stock of that exact model.
The first decision is quantity: one phone plus earbuds needs a different system from a laptop, camera batteries and several adapters. The second is your bag’s inside pocket dimensions. Finally, think about where you will open the organiser. A stable clamshell can be useful on a desk but awkward on a seatback tray.
Osprey Daylite Powerhouse
A one-litre style for short leads, earbuds and a compact charger.
Bellroy Tech Kit Compact
A lay-flat opening makes it easy to see small accessories.
Aer Cable Kit 3
A roomier 2.6L case for plugs, cables and adapters.
Check depth
A pouch that zips closed empty may bulge badly once loaded.
At-a-glance comparison: ten exact models
Start here: each row names one verified manufacturer model, its most useful role and the main trade-off. The buying recommendations are research-led, not the result of first-hand product testing or equivalent laboratory scores. Use the linked model page to confirm region, version and current stock before ordering.
| Product and official model page | Best for | Key trade-off |
|---|---|---|
| Bellroy Tech Kit Compact | Best compact lay-flat organiser | It is not the cheapest way to carry a single lead |
| Peak Design Tech Pouch, Regular | Best structured desk layout | A heavily compartmentalised case can become a brick inside a small |
| Aer Cable Kit 3 | Best for several power bricks | At 2.6 litres it is easy to overfill. It may be |
| Thule Subterra 2 Powershuttle Medium | Best divided everyday case | The five-centimetre depth becomes the constraint: a tall UK plug, camera |
| Native Union Stow Accessory Organizer | Best refined slim carry | The softer pockets are not individually hard-sided, and any outer pocket |
| tomtoc Navigator-T13 Accessory Pouch S, 1.4L | Best small accessory pouch | Its tall closed dimension may matter in a shallow purse or |
| Osprey Daylite Powerhouse 1L | Best one-litre essentials | The upright nine-centimetre dimension is less flat than a simple mesh |
| Osprey Transporter Powerhouse 2L | Best two-litre grab bag | Although the fabric is described as highly water-resistant, zips and closures |
| BAGSMART Athena Electronic Organizer | Best budget-style soft organiser (UK stock check) | BAGSMART currently shows the Athena organiser as sold out on its |
| Peak Design Tech Pouch, Small | Best small origami-divider option | It is easy to assume every feature of the regular model |
How the ten products were selected
Research-led selection, not claimed hands-on testing
Each model is a distinct design, not a colour variation. The primary button links to the exact official product page where available. A second Amazon UK link, clearly labelled a model-specific search, is included only as a shopping fallback; results can contain unrelated variants. Review seller identity, exact model, returns and country compatibility before ordering.
Relevant background: Check the current battery-carrying guidance [11]. See how Amazon shopping links work [12]. Review UK airport security advice [13].
Bellroy Tech Kit Compact
Published design and useful specifications
Bellroy lists a compact, lay-flat softshell pouch with elastic loops, stretch-mesh pockets and a separate slip pocket for a power bank. Its published footprint is smaller than the standard Tech Kit, and the structured shape remains flexible rather than completely rigid.[1]
Best for a phone-and-laptop traveller who wants to open one pouch on a hotel desk and immediately see the charger, mouse and two cables. The flat opening is a genuinely useful distinction when you are repacking every other night.
The meaningful drawback
It is not the cheapest way to carry a single lead; its loops also reward a tidy cable coil rather than a bulky charging brick wedged diagonally. A large UK plug and a high-output multiport charger may occupy more space than the photographs suggest.
Try laying out your real charger, plug and earbuds in a rectangle the size of an A5 notebook before spending. Give the power bank its own slip pocket and check that the zip closes without pressure on connectors.
A real comparison against alternatives
Compared with the Osprey 1L pouch, Bellroy places greater emphasis on lay-flat visibility; against Aer, it is a more restrained one-desk kit.
For a realistic pre-trip check, group one laptop cable, a UK power plug, a phone lead and earbud case on a sheet of paper. Compare the shape of that pile with the Compact’s internal compartments rather than the case’s external length. If the plug needs to stand upright, the resulting bulge may be the deciding factor. Keep one lead accessible without opening the complete pouch on the aircraft tray.
Peak Design Tech Pouch, Regular
Published design and useful specifications
The regular Tech Pouch uses origami-style internal dividers, cable loops and an external zip pocket with cable pass-through. Peak Design describes a 400D recycled-nylon canvas shell, weather-resistant construction and broad clamshell access.[2]
Best for photographers, laptop users and people who genuinely carry several different small devices. Divided bays make it easier to keep a hard drive away from loose plugs while retaining the option to open the case on a desk.
The meaningful drawback
A heavily compartmentalised case can become a brick inside a small under-seat bag. Cable pass-through is useful for charging but does not make the pouch a sealed weatherproof case, nor does it protect equipment from every knock.
Pack the highest-frequency USB-C cable into the quickest pocket. Keep heavier wall chargers central and test the pouch in your backpack against a laptop sleeve, not only standing alone on a table.
A real comparison against alternatives
Choose Bellroy Compact for a lighter kit; pick Peak Design if distinct internal zones matter more than the smallest possible volume.
The origami layout offers a potential separation benefit for a small external SSD, loose adaptors and two charging systems. It also creates a temptation to fill every divider merely because one is present. Build the kit around equipment you will actually use during this trip. If you seldom carry more than a phone charger and earbuds, pay for a smaller pouch rather than unused clever compartments.
Aer Cable Kit 3
Published design and useful specifications
Aer publishes a 2.6-litre capacity, wide-opening main compartment, front quick-access pocket and 1680D Cordura exterior. The design is oriented towards several tech essentials rather than a minimalist single-charger setup.[3]
Best for a laptop charger, international adapter, mouse and two or three extra leads, particularly when you spend time working from hotels and prefer one large tech kit.
The meaningful drawback
At 2.6 litres it is easy to overfill. It may be inconvenient in a narrow cabin seat or a 20-litre bag where the same space could hold a spare layer. The exterior coating is described as weather-resistant, not waterproof.
Put the travel adaptor into the centre of the case, and use side pockets for smaller connectors that otherwise vanish underneath it. Before departure, lift the full kit by its handle and check whether anything shifts across pockets.
A real comparison against alternatives
A compact Bellroy or Osprey pouch is preferable if your actual load is three cables and earbuds rather than a mobile office.
The practical question with a larger case is whether it becomes a mobile desk organiser or just a storage brick. If you often work from several hotel rooms, place the loaded pouch open on the desk and leave cables attached to their devices only where safe. If you travel through several airports in one day, consider how quickly the whole kit returns to the bag without catching zips or straps.
Thule Subterra 2 Powershuttle Medium
Published design and useful specifications
Thule lists the medium model as 22 × 5 × 14.5 cm with a stated mass of 0.2 kg. Elastic pockets, YKK zips, a key attachment and small-document storage are designed to keep travel accessories separated.[4]
Best for a flat rectangular organiser that can sit beside documents or a compact notebook rather than a chunky cube of plugs. The clearly stated depth is a useful planning figure for personal-item fit.
The meaningful drawback
The five-centimetre depth becomes the constraint: a tall UK plug, camera charger or chunky mouse may fight the zip even when there is free horizontal space. The fabric is robust, but still needs a separate dry bag around genuinely water-sensitive kit.
Place a charging brick at one end and short cable coils opposite, then measure the closed profile. If it bulges beyond the listed depth, switch the plug to an adjacent backpack pocket rather than forcing the seam.
A real comparison against alternatives
Thule Medium is flatter than Aer’s 2.6-litre Cable Kit and makes more sense for travellers with a slim laptop bag.
Measure the thickness of a real three-pin UK charging plug before judging Thule’s low-profile case. The outer length and width can look ample while the depth remains the limiting dimension. Thin items such as SIM tools, adaptors and spare cards can sit beside one another, but one tall charger may force an uneven bulge. A slim laptop sleeve is only useful if the organiser also stays slim when full.
Native Union Stow Accessory Organizer
Published design and useful specifications
Native Union specifies flexible loops and internal pockets, an exterior stow pocket, a resistant textile exterior and soft quilted lining. It is intended as a durable everyday organisation pouch for chargers and devices.[5]
Best for travellers who carry delicate earbuds and a power bank alongside leads and prefer some padding rather than an unstructured mesh wallet. The outer stow pocket suits an item needed regularly.
The meaningful drawback
The softer pockets are not individually hard-sided, and any outer pocket can increase the effective packed depth. It offers protection from ordinary abrasion, not from a hard impact or an overstuffed rucksack being compressed overhead.
Use the exterior pocket for a short lead rather than travel documents or expensive small accessories that need more secure containment. Take a quick photo of the layout so you know where every part belongs when repacking.
A real comparison against alternatives
The native-union approach is softer and more minimalist than the many origami compartments in Peak Design.
The soft lining changes how you should distribute hard items. Put a compact power bank in the more secure interior area, with cables arranged so their metal ends cannot scrape neighbouring accessories. An outside pocket may make a frequently used cord convenient, but it is not where to keep small valuables that could slip out as you move the case between a lounge chair and the overhead bag.
tomtoc Navigator-T13 Accessory Pouch S, 1.4L
Published design and useful specifications
tomtoc publishes a 1.4L small pouch with three non-slip loops, three small pockets, water-repellent fabric and YKK zips. Manufacturer dimensions are 9.06 × 5.91 × 2.56 inches, with a stated weight of 230g.[6]
Best for a compact electronics kit that contains a charger, charging lead, memory cards and a small power bank. The identifiable T13S model also makes it easier to avoid buying the larger T13M in error.
The meaningful drawback
Its tall closed dimension may matter in a shallow purse or ultracompact personal item; and tomtoc’s own US site states US-only shipping, so UK shoppers must check an authorised local seller.
Treat the separate loops as a way to keep connectors from scraping the hard edge of a plug. Close the kit around your actual UK plug, then place it into your chosen backpack pocket to check access.
A real comparison against alternatives
The T13 Small offers more internal segmentation than Osprey Daylite while remaining far less capacious than Aer.
Tomtoc’s listed dimensions are most useful when you compare them with the inside of the exact backpack pocket you plan to use. Do not infer that a small model will fit every under-seat bag. The 1.4-litre number describes capacity rather than the length of your tallest charger, and an overstuffed pouch can become difficult to retrieve beneath a seat without opening your entire pack.
Osprey Daylite Powerhouse 1L
Published design and useful specifications
Osprey describes a one-litre cable organiser with elastic cord loops, battery-bank pocket, earbud space and an external pocket capable of holding a passport. The UK page lists 13 × 14 × 9 cm and 0.1 kg.[7]
Best for a daily minimalist technology kit rather than a portable office. Its small load encourages sensible cable reduction: one multifunctional charger, one or two short leads and a compact battery.
The meaningful drawback
The upright nine-centimetre dimension is less flat than a simple mesh sleeve. Osprey listings can vary by colour and may show unavailable variants, so do not assume stock from a cached page.
Build a one-day kit in this order: phone cable, earbuds, travel adaptor if really required, and small power bank. Anything you do not use on three trips can probably stay out of the small pouch.
A real comparison against alternatives
Choose Osprey Daylite for a travel-light routine; the Transporter version offers an additional litre if the power brick is genuinely substantial.
With a one-litre system, decide what stays outside the kit before packing: for example, the charging lead used during a flight may live in the seat-access pocket, while less-used adapters remain inside. This prevents constant opening and closing. A design that can also hold a passport does not make the outer pocket the safest place for identity documents; use an adequately secure bag compartment.
Osprey Transporter Powerhouse 2L
Published design and useful specifications
Osprey’s Transporter Powerhouse is a 2L tech organiser with elastic cord keepers, an internal battery pocket, an earbud pocket and coated NanoTough fabric. Published size is 14.5 × 23 × 8 cm and weight 0.17 kg.[8]
Best for commuters or travellers carrying two power systems, such as a laptop charging brick and a camera charger, while wanting a tough pouch rather than a large hard case.
The meaningful drawback
Although the fabric is described as highly water-resistant, zips and closures are not the same as a dry-bag seal. The 23cm width may also be excessive for smaller bag pockets.
Place the heavier brick along the base edge and separate wired earbuds from sharp adaptor pins. If the pouch lives under your seat, position the outer zip facing up so the charger is accessible without unloading your bag.
A real comparison against alternatives
The Transporter offers more room than the one-litre Daylite but is more purposeful and smaller than some workstation-style organisers.
A modular pouch can work well when your packing requirements change between business and leisure trips. However, keep the internal arrangement legible: one section for charging, one for storage, one for emergency accessories. Before buying, examine whether the internal dividers will genuinely hold your devices without connectors jamming in the closing zip. A smaller independent case may still be preferable for fragile camera cards.
BAGSMART Athena Electronic Organizer
Published design and useful specifications
BAGSMART describes an electronic organiser measuring 23.9 × 17 × 3.6 cm, with compartments for leads, cards, chargers and small tech. The UK product listing has shown unavailable variants, so treat it as a design benchmark rather than guaranteed purchase stock.[9]
Best for comparing a thin, folio-shaped cable wallet with deeper zip pouches. The relatively shallow closed profile makes sense when travelling with a laptop sleeve and limited front-pocket room.
The meaningful drawback
BAGSMART currently shows the Athena organiser as sold out on its UK product listing (checked 13 October 2026); do not treat an Amazon search as confirmation that a different style is the same item. Its small pockets will also struggle with large UK wall plugs. If you need to purchase immediately, select an available model from the other options instead.
Lay your cables along the longest internal axes and use small slots for adapters or memory cards. Do not tuck a sharp three-pin UK plug against a tablet screen merely to keep everything flat.
A real comparison against alternatives
Consider the Thule Medium if you want an in-stock rectangular alternative with published dimensions and straightforward pockets.
Be careful with very slim zip-style tech sleeves: capacity can be reduced by a protective outer shell, even where dimensions look generous in a specification table. A flat pouch is excellent for braided cables and a thin power bank but may be the wrong item for a bulky multi-port charging plug. Use photographs of the exact closed, loaded model rather than only marketing pictures of an empty case.
Peak Design Tech Pouch, Small
Published design and useful specifications
Peak Design offers a smaller version of its Tech Pouch, described as roughly half the original’s size, with origami dividers, elastic loops and a cable pass-through pocket. Check the selected size and colour on the product page because stock can differ between variants.[10]
Best for travellers who like Peak Design’s visible internal layout but carry one charging system and are unwilling to give the full-sized organiser valuable bag space.
The meaningful drawback
It is easy to assume every feature of the regular model scales perfectly. In reality, a large adaptor or power bank can monopolise a small bay; check actual product variant and dimensions before deciding.
Load the largest object first, then allocate loops to only the cables used daily. If you cannot close the small version gently, switch to Bellroy or Thule rather than stretching the zipper.
A real comparison against alternatives
Compared with regular Peak Design, this is the better choice only when your actual kit—not an aspirational future kit—fits.
Specialist cable wallets reward disciplined packing. If one loop holds each short lead, it is easier to identify the right connector without unspooling everything. The compromise is that long cords or a large power supply may need a second compartment. Before departure, remove adapters for devices you are not taking; otherwise a beautiful system still carries redundant weight across every connection.
Pouch size, opening style and charger fit
What actually makes a cable organiser useful
A useful organiser reduces searching, not merely visual clutter. Count the connectors you carry and separate the items that must stay available during a journey from those needed only at the hotel. A charging cable used in a seat should not be buried beneath an international adapter and a power bank. If your cabin bag has its own dedicated electronics pocket, a second elaborate organiser may provide very little gain.
The decision changes again if you travel with camera batteries, a laptop dongle or memory cards. These are small enough to disappear into loose fabric, yet their hard edges can scratch a device. Give them a closed pocket or narrow loop. A pouch can be protective against ordinary rubbing without being a padded camera case, so reserve delicate optics for appropriate purpose-built protection.
How to measure the packed kit
Start with the largest charger rather than the bag’s advertised capacity. Measure your UK plug including the projecting pins, then lay it on a flat surface next to the charging brick and power bank. Add the cables only after those rigid objects have determined the shape. The most useful measurement is often filled depth, because flexible pouches expand beyond their neat catalogue outlines.
Test the destination bag with a full-size template cut from paper. Try it against the laptop sleeve, zipped internal pockets and personal-item opening. A case that fits horizontally may still be difficult to remove if its zipper sits against a divider. Make sure the organiser does not force your water bottle into the same internal pocket as expensive electronics.
Cables versus bulky travel plugs
Cable loops hold flexible wires well but cannot make a large plug thinner. A compact USB-C multiport charger may replace several bulky adapters, provided its wattage and ports support your actual laptop and phone. Check the laptop maker’s power requirements before consolidating. Some laptops will charge slowly or display a warning from a low-power adaptor.
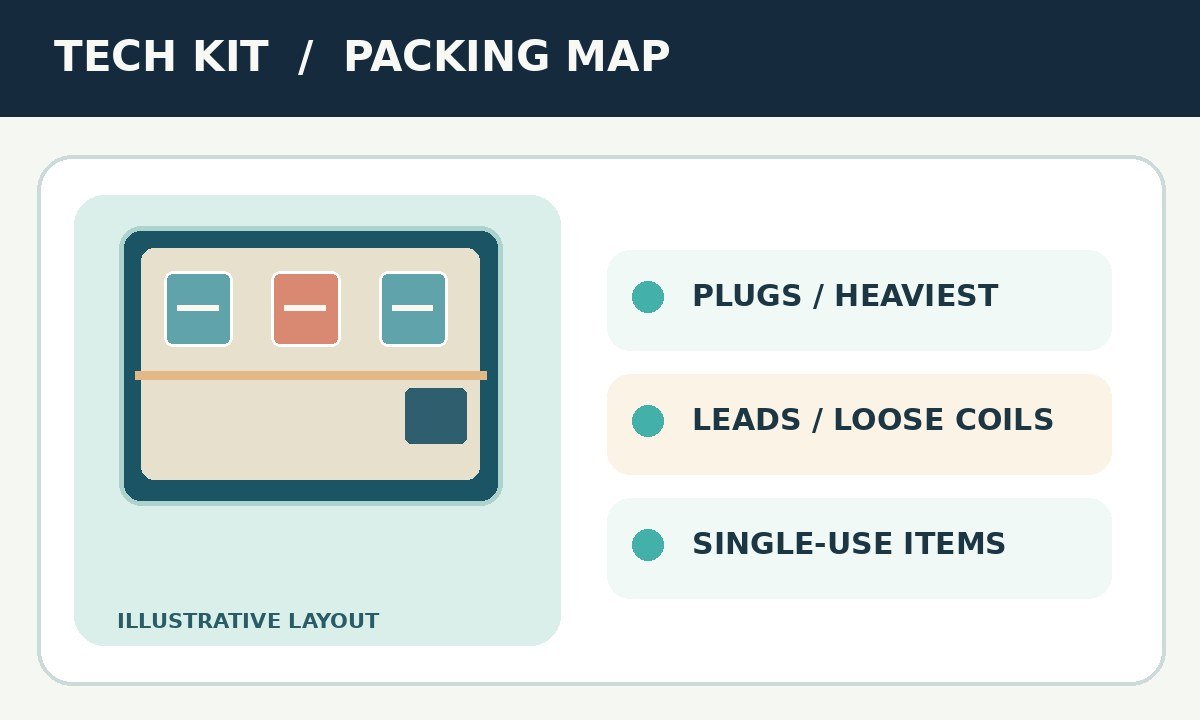
Keep universal travel adaptors physically separate from tiny memory cards. Their weight and protrusions can damage lighter accessories when the bag is compressed. If the organiser includes a padded central pocket, put the plug there, not against the weakest edge seam. Travellers using both UK and EU sockets should also check where the plug will sit overnight, not only at the airport.
Charging routines, laptop gear and cable protection
Best layout for a cabin-seat charging routine
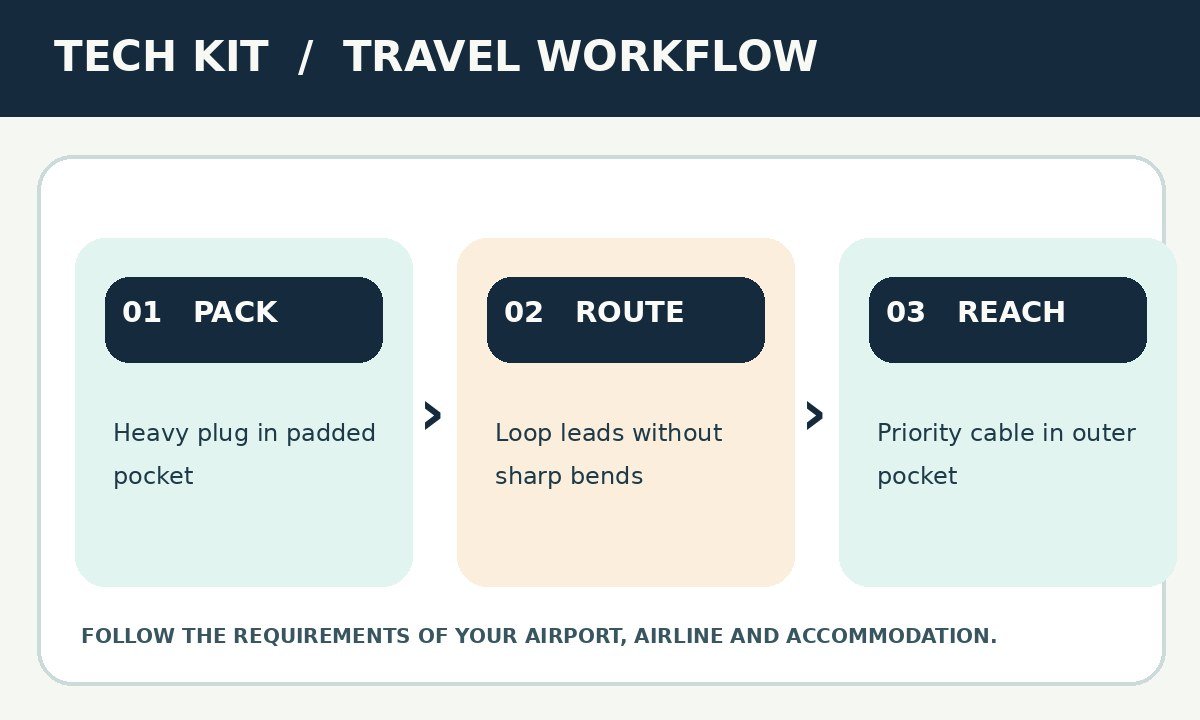
For a flight, create a miniature seat kit: phone, one suitable charging cable, earbuds and perhaps a compact power bank if allowed by your carrier. Put this in the organiser’s exterior or first-access pocket. Cabin outlets and USB sockets differ in availability and power, so do not rely on one being fitted or working. If a charger is needed, keep it available without opening your whole backpack in the aisle.
Avoid long cords spilling across a tray table or footwell. A short, flexible USB-C lead normally occupies less space and creates fewer snags, while a longer hotel-room cable can stay inside. Never charge a damaged or swelling battery pack. Airline and airport rules for spare batteries can change, so verify them directly with your carrier before departure.
Organise a travelling laptop workstation
A hotel-desk setup has different priorities from an aircraft. The laptop power brick, HDMI adapter, mouse and cable should come out in a predictable sequence. Lay-flat clamshell organisers can stay open as mini-desk caddies, but only if the desk has sufficient space. On a narrow bedside table a soft, slim pouch that can stand in the backpack may be more practical.
Create a simple shutdown routine: unplug the adaptor from the wall first, coil its cable loosely, then stow the mouse and dongles. This helps prevent leaving a cable plugged behind furniture. Check every room outlet before connecting expensive devices, and use an appropriate travel adapter rather than forcing a plug or using a damaged socket.
Protect cords, ports and small accessories
Most tangles come from loosely thrown loops snagging on plug pins and zips. Coil cables without bending them tightly at the connector; secure them with a reusable strap instead of knots. A short lead deserves its own loop if it is the one you will need under pressure at boarding or arrival. Avoid storing exposed contacts alongside wet toiletries.
Memory cards and tiny USB adaptors belong in a closeable pocket or dedicated card case. Mesh pockets help you see contents, but open elastic bands are not secure enough for every small item. Pouches with padding can reduce abrasion, although none should be considered drop-proof unless a manufacturer specifically certifies that level of protection.
Materials, value and packing layouts
Choose fabric and zips realistically
Manufacturers use terms such as water-resistant, weather-resistant and coated fabric, but these do not automatically describe the zipper or seam performance. A pouch left in a wet backpack can still admit water. For a rainy arrival, carry the organiser inside your bag’s waterproof compartment or a separate liner. Do not make the cable pouch responsible for protecting a laptop from a leaking bottle.
Inspect the zip track, pull tabs and corner stitching because these are stressed when the pouch is overfilled. A flexible shell has the advantage of squeezing into small gaps; however, it may allow hard chargers to press against nearby items. A structured shell retains its shape but can waste space when half empty. Neither is universally better.
What a budget option should still do
A budget organiser does not need elaborate fold-out engineering. It should close without strain, keep the charger apart from earbuds and allow the day’s cable to come out promptly. Prioritise a dependable zipper and the right dimensions over extra mesh sections you will never fill. If a basic two-pocket pouch meets those needs, paying more may not improve the travel experience.
Also count the true cost of duplicate gear. Buying a larger case can encourage additional chargers and leads that add baggage weight and reduce simplicity. Before upgrading, remove out-of-date connectors and one-off camera accessories from the everyday kit. Keep specialist cords in a separate labelled pouch used only on trips that require them.
Sample packing layouts for three travellers
For a weekend city break, a phone charger, earbuds and one USB-C lead can often live in a one-litre pouch with room to spare. For a two-week work trip, add a laptop charger, travel adapter, mouse and one backup cable, which usually calls for more deliberate compartment separation. For photography travel, protect card storage and hard drives independently from exposed plugs.
These are packing examples rather than required shopping lists. A reader with a single USB-C ecosystem may need fewer adapters, while someone with medical electronics or specialist photography equipment will have non-negotiable accessories. Set your own list first and select the organiser second, not the other way round.
Realistic kit examples and size checks
Build three different tech kits for three kinds of journeys
A simple weekend bag may need one compact UK charger, a short USB-C cable, a phone and earbuds. Leave laptop peripherals, hard drives and a duplicate adapter at home when you will not use them. A small one-litre pouch can be more functional here than a larger case with many unused compartments. Measure the pouch inside the packed bag rather than assuming a brand’s small size fits every airline personal-item allowance.
A working trip changes the equation. A laptop charging brick, mouse, HDMI adaptor, power bank and several connectors may justify divided storage. Keep the power bank in cabin baggage in accordance with the airline’s battery rules, which are separate from the suitability of the organiser itself. If the pouch cannot accommodate the large UK plug without deforming, use a second designated pocket instead of fighting the zip.
Photographers need yet another pattern. Cables may share a pouch, but fragile SD cards, spare camera batteries and delicate lenses should be protected according to their own storage and transport requirements. A cable organiser is not automatically a shockproof memory-card case or an approved lithium-battery carrier. Separating functions can save time during both travel and setup.
How to check organiser dimensions without buying twice
Lay out your largest and least flexible item first: often a three-pin plug, charger or travel adapter. Measure length, width and thickness. The thickness is frequently forgotten because catalogue photos show accessories arranged flat. Add the smaller cables in coils with a relaxed bend near their connectors, then allow space for the shell, pockets, foam and zip track before comparing with the maker’s exterior measurements.
Next check where the kit must live: the outer backpack pocket, the space under a laptop sleeve or a trolley case compartment. A case that is theoretically small can become difficult to retrieve if its handle snags the surrounding lining. Consider whether you will unpack once per trip or open the pouch several times each travel day; that decides whether lay-flat access is a premium worth paying for.
Finally, check the retailer returns policy and the exact model code. Several manufacturers have compact and regular versions with near-identical names. A retailer search may surface a larger size or different generation. Use the official manufacturer page as the specification anchor and do not pay for a feature you cannot locate in that model.
Batteries, airport security and easy access
Battery, security and quick-access planning
Packing a power bank into a tech pouch does not replace airline restrictions on batteries. Spare lithium batteries and power banks are commonly restricted to cabin luggage, and individual airlines impose further conditions on watt-hours, quantity and use during flight. Review the specific carrier’s current rules before departure and protect exposed terminals according to its instructions. An organiser is for convenience, not regulatory approval.
At security, it may be necessary to remove electronics depending on airport equipment and staff directions. Keep the organiser easy to find without revealing passports or cash. A pouch with external compartments may encourage packing valuables on the outside; resist that if the pocket is not secure. Separate your charging cable used in flight from backup connectors to minimise rummaging.
After each journey, discard broken leads, check plug pins and update the kit for any new device connections. Cables that appear intact can still charge inconsistently, so test the main route before travelling. The cheapest maintenance habit is a five-minute functional review, not adding more compartments.
Mistakes that waste packing space
Common buying mistakes and how to avoid them
First, trusting an empty product photograph hides how bulky a real British plug can be. Secondly, equating a weather-resistant shell with waterproof protection invites disappointment. Thirdly, ordering a medium organiser for a tiny cabin bag without checking the zipped thickness defeats the purpose of organising. Check both the pouch measurements and your airline bag’s actual interior dimensions.
Other avoidable errors include storing a power bank where the on/off button gets pressed, mixing wet charging cables with toiletries, and forgetting a spare lead after replacing a device. Finally, watch product versions: a compact and regular pouch may share a product page while differing significantly in real storage space.
Pros, cons and common trade-offs
Advantages
- Organised connectors mean less searching
- Dedicated access can save cabin-seat space
- Different sizes support different device sets
Limitations
- Pouches can become bulky when overfilled
- A soft organiser is not certified impact protection
- Chargers or batteries still face airline rules
None of these trade-offs is automatically decisive for everyone. Start with the physical demands of your trip, identify the worst plausible failure for your bag and favour the simplest model that avoids it. A predictable routine usually delivers more value than unused premium features.
Frequently asked questions
These answers cover recurring questions that affect packing, aircraft use, compatibility and product choice. Always follow the current instructions for the exact manufacturer model and transport provider.
Will a cable organiser count as an extra piece of hand luggage?
Usually the pouch itself sits inside your personal item or cabin bag, but an airline can count a separate handheld pouch as another item. Pack it inside the permitted bag before the gate and check the carrier’s current allowance rather than assuming small accessories are exempt.
Is a water-resistant tech pouch waterproof?
No. A fabric coating can repel splashes while zips and seams still admit moisture under pressure or prolonged rain. For devices that must stay completely dry, use a properly specified protective case or liner and keep liquids elsewhere.
Should I choose a soft pouch or a hard organiser?
A soft pouch fits unused corners and often weighs less; a rigid organiser keeps its shape and can shield connectors from ordinary compression. Neither automatically protects a device against falls. Choose by bag fit and what you carry.
Do I need separate compartments for every cable?
No. Two different-length charging leads can share one elastic section if connectors are not rubbing together. The important separation is between hard plugs, easy-to-lose items and the cable you need during the journey.
Can a cable pouch hold a power bank on flights?
A pouch may be suitable for storage, but most airlines require spare lithium batteries and power banks in cabin baggage under their own specific restrictions. Check watt-hours, terminal protection and carrier rules. Do not rely on a pouch label to establish airline compliance.
What size organiser is best for one-bag travel?
There is no universal litre target. Lay out your largest charger, one or two cables and earbuds, then add only useful slack. In a small backpack a one-litre model may be adequate; a large work charger can change the decision completely.
How can I stop a cable from fraying?
Coil loosely, avoid tight turns right next to the plug and store connector heads away from sharp pins. Replace damaged leads rather than taping a potentially unsafe connector for use abroad.
Is a camera battery pouch the same as a cable organiser?
Not always. Batteries may require individual terminal protection and specific cabin restrictions, while memory cards benefit from a more secure hard case. A general cable pouch is intended for organisation, not certified battery containment.
Should I buy the largest pouch for future devices?
Not necessarily. Extra capacity invites weight and can crowd the personal item. You can keep specialised camera or work gear in a second pouch only when the trip needs it.
How often should I review my cable kit?
Check it before each trip, especially after replacing a phone or laptop. Remove duplicate connectors, test the charger with the actual device and confirm overseas plug compatibility well before departure.
Final recommendation: match the model to your trip
What changes the decision
Choose the organiser that matches your current cable count and the bag it will live in. Bellroy Compact is an appealing research-led starting point for a balanced daily kit; Osprey Daylite makes sense when simplicity and small size matter most; Aer Cable Kit 3 is better suited to a collection of work chargers. Thule and Peak Design offer alternatives where flat dimensions or divided access are priorities.
Practical planning example
Before purchasing, verify the exact colour and size, UK availability, retailer returns and whether the published images match your intended variant. The order of these ten options reflects practical use-case fit, not personal laboratory tests or an objective performance score. A carefully packed inexpensive pouch may serve you better than any premium organiser used badly.
Sources and fact-checking
References [1]–[10] are official pages for the precise named products. References [11]–[13] support the relevant regulatory, travel, shopping or general context. Manufacturer claims are not presented as independent tests; availability and specifications may change. Checked for this editorial review: 13 October 2026.
- Bellroy Tech Kit Compact — official product information — manufacturer’s published design and specification; checked 13 October 2026.
- Peak Design Tech Pouch, Regular — official product information — manufacturer’s published design and specification; checked 13 October 2026.
- Aer Cable Kit 3 — official product information — manufacturer’s published design and specification; checked 13 October 2026.
- Thule Subterra 2 Powershuttle Medium — official product information — manufacturer’s published design and specification; checked 13 October 2026.
- Native Union Stow Accessory Organizer — official product information — manufacturer’s published design and specification; checked 13 October 2026.
- tomtoc Navigator-T13 Accessory Pouch S, 1.4L — official product information — manufacturer’s published design and specification; checked 13 October 2026.
- Osprey Daylite Powerhouse 1L — official product information — manufacturer’s published design and specification; checked 13 October 2026.
- Osprey Transporter Powerhouse 2L — official product information — manufacturer’s published design and specification; checked 13 October 2026.
- BAGSMART Athena Electronic Organizer — official product information — manufacturer’s published design and specification; checked 13 October 2026.
- Peak Design Tech Pouch, Small — official product information — manufacturer’s published design and specification; checked 13 October 2026.
- UK Civil Aviation Authority: lithium batteries and power banks — www.caa.co.uk.
- Amazon Associates: linking to search pages — affiliate-program.amazon.co.uk.
- UK Government: airport hand baggage guidance — www.gov.uk.
Illustrations in this article were created for Taylor’s Trailblazing Travel Gear. Third-party photographs, where used, are credited beside the image or in the source list.
Back to this guide ↑