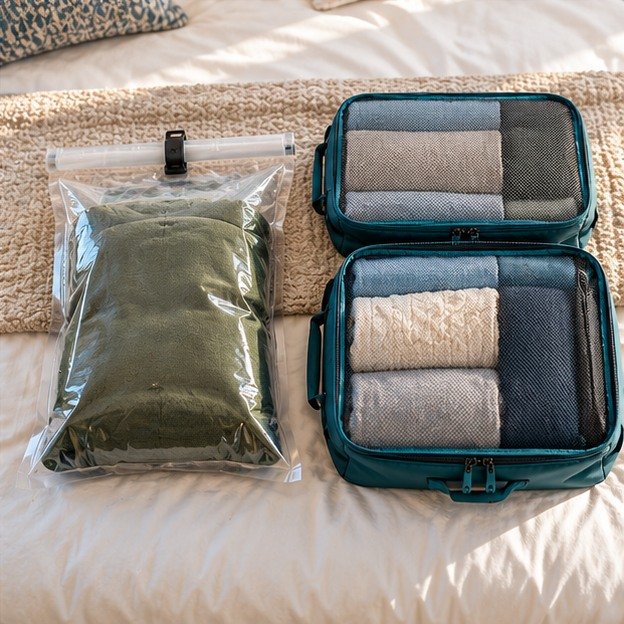
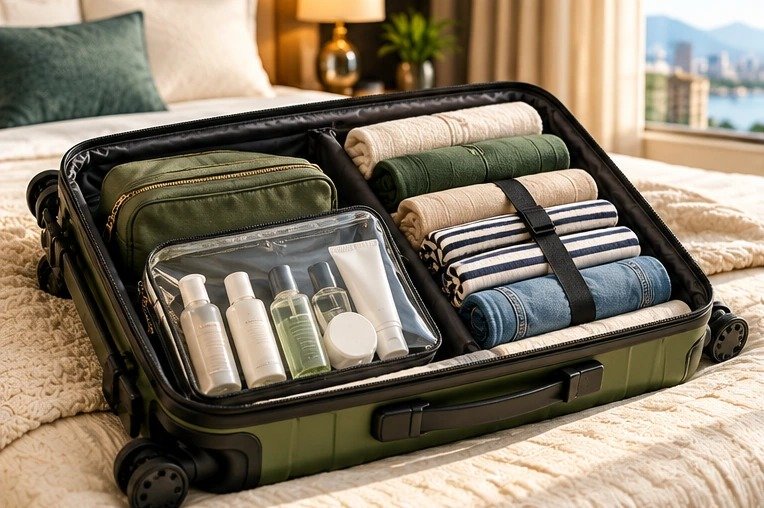
AI-created editorial scene; not a photograph of products personally tested.
A shampoo spill is annoying, but the more expensive problem is what it reaches: clothes, a passport, a charger or the lining of a suitcase that is difficult to clean. Learning how to stop toiletries leaking starts with the container and closure, not with buying the largest wash bag.
This guide separates three jobs that are often confused: preventing a leak, containing one if it happens, and protecting the packed bottles from pressure. It also explains why a suitable home check is useful without pretending that it certifies a bottle for every flight or validates a cosmetic formula.
The recommendations are research-led, based on product instructions and official travel guidance rather than personal product testing. You will find six optional gear examples, but there is no need to replace sound equipment that already works. Begin with the actual liquids you carry and improve the weakest part of the system.
Some buying links may earn us a commission at no extra cost to you. As an Amazon Associate, I earn from qualifying purchases. Product choices are based on their relevance to the packing or charging problem, not simply on the availability of a buying link.
Sound closures
Replace a damaged cap before adding layers.
Compatible packaging
The formula and container must suit each other.
A sealed inner barrier
An organiser and a watertight pouch have different jobs.
No pressure on caps
Close the case normally, then inspect the packed zone.
How to stop toiletries leaking: the reliable packing sequence
Fix the bottle before buying another bag
Start by putting every liquid on a washable surface and checking the actual closure. A split hinge, missing seal or cap that turns without tightening is a reason to replace the container, not an invitation to add several layers of tape. Next, decide which products should stay in their original packaging. Only decant a product when its manufacturer and the new container’s instructions allow that combination.
For an ordinary refillable wash bottle, clean the sealing surfaces, add the amount needed without filling into the neck, and close it using its intended mechanism. Keep the outside dry so a subsequent leak is visible. Then test it over a tray before putting it in a sealed secondary pouch. Finally, pack the pouch where hard objects will not press against the lids.
Give each layer a different job
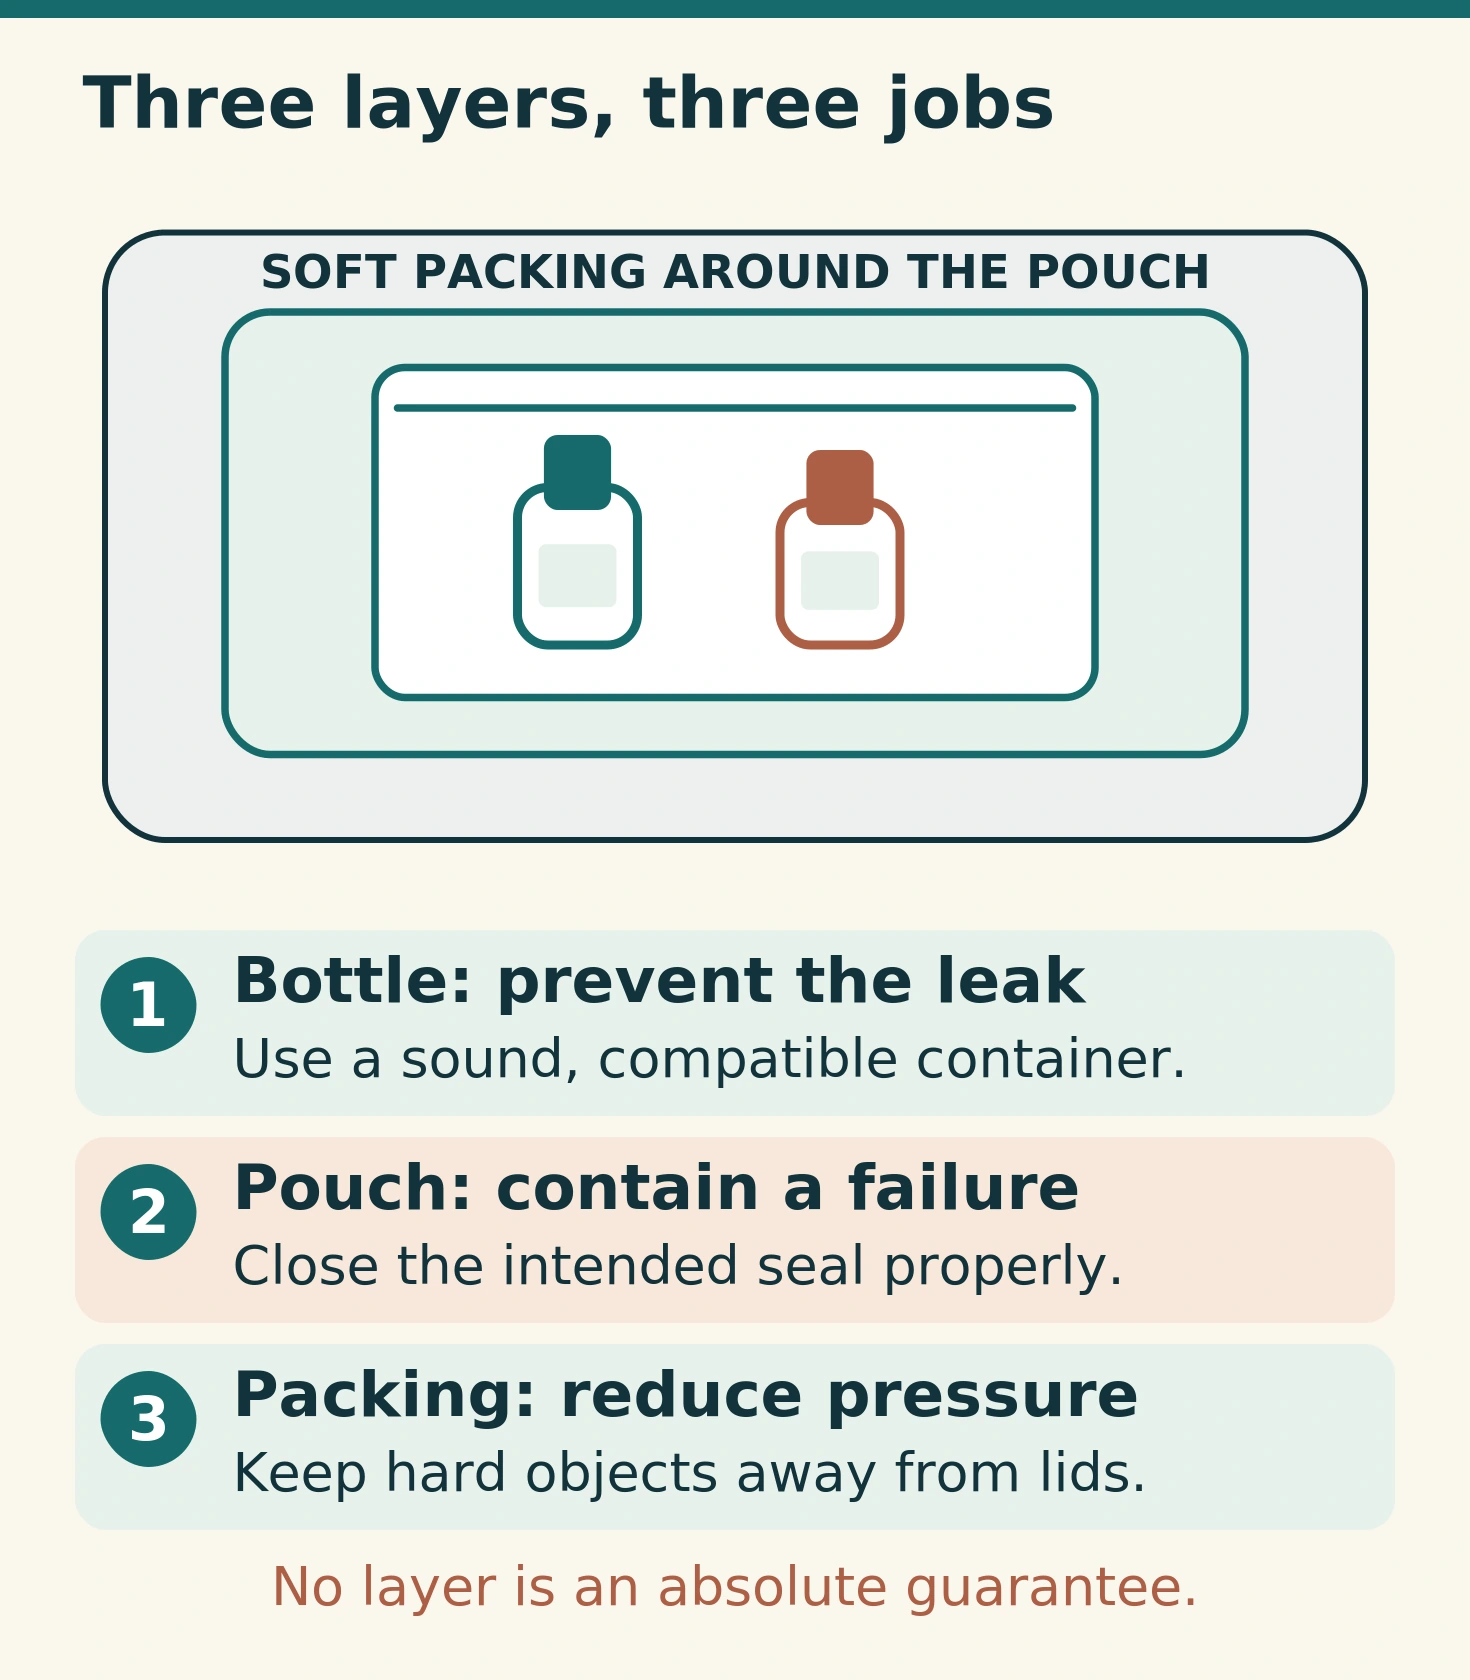
Think of the system as three separate protections. The bottle retains the product. An inner pouch limits the consequences if the bottle fails. Surrounding soft packing protects both from crushing and abrasion. None replaces the others, and none is an absolute guarantee against rough handling.
On a narrow screen, swipe within the table to see every column.
| Layer | Its job | What it cannot fix |
|---|---|---|
| Correct bottle and cap | Hold a compatible product securely | A cracked lid, damaged seal or unsuitable formulation |
| Properly closed inner pouch | Keep an accidental spill away from other belongings | A bottle that repeatedly empties itself |
| Sensible suitcase placement | Reduce pressure on closures and protect fragile packaging | A case packed so tightly that everything is compressed |
For a short trip, start with sound containers you already own. Replacing a failed bottle is useful; replacing an entire wash kit because one cap is dirty usually is not.
Diagnose the leak rather than blaming every flight
Follow the first wet mark
After a spill, wipe the container clean and inspect it away from the luggage. Product around the screw thread suggests the cap or neck needs attention. Residue at the dispensing hole points towards a valve, flip lid or accidentally activated pump. A wet patch halfway down the body suggests damage or a seam problem. These are diagnostic clues, not proof of a single cause.
A bottle can also look leaky because product was left outside during filling. That is why a clean, dry exterior matters before testing. Wrap a separate strip of dry tissue around the neck while the bottle sits in a tray; do not put tissue inside the closure or leave it packed as a substitute for containment.
Pressure is only part of the story
Changes in temperature or ambient pressure can stress a container, but physical compression and loose closures matter too. FAA guidance identifies vibration, temperature and pressure variation among the conditions that can cause hazardous materials to leak during transport. It does not establish that every toiletry spill was caused by aircraft pressure. [1]
Avoid promises that a particular filling percentage will make every bottle flight-proof. Bottle stiffness, trapped air, valve design, liquid viscosity and the way the bag is handled all differ. A practical home check can reveal an obvious problem, but it cannot reproduce every journey condition.
Keep a short note of which bottle and product combination failed. Otherwise, it is surprisingly easy to rinse everything, refill the same unsuitable bottle and repeat the problem on the next trip.
Decide what should remain in its original container
Packaging compatibility comes before uniform bottles
A matching set of silicone bottles looks tidy, but silicone is not suitable for every formulation. Humangear specifically advises against putting several product types into GoToob+, including certain hair treatments, salicylic-acid products and DEET repellents; other formulations require individual checks. These restrictions should not be assumed to apply identically to every brand, but they demonstrate why the ingredient and container instructions both matter. [2]
Keep sunscreen, strongly fragranced oils, specialised treatments and products with important dispensing or storage instructions in their labelled original packaging unless the manufacturer confirms a suitable alternative. This is a conservative packing recommendation, not a claim that every transfer causes deterioration. The original bottle also preserves the product identity, directions and batch information.
Never treat a leak check as a stability test
A liquid remaining inside a bottle overnight does not prove that its formulation will stay stable, hygienic or effective. Those are separate questions. FDA guidance explains that cosmetic shelf life depends on the product, its use and its storage, and that contamination and environmental exposure can change it. [3]
Do not decant contact-lens solution or prescribed treatments into general travel bottles merely to make the wash bag match. Use the supplied packaging and obtain product-specific advice when necessary. For ordinary cosmetics, photograph the original label before travel and label any permitted decant clearly enough that another person could identify it without guessing from the colour.
Match the container to the way you dispense the product
Screw caps, flip lids and pumps behave differently
A simple screw-cap bottle can be easy to inspect because the neck and closure are visible. Flip-top bottles are quicker in the shower but have a separate hinge and dispensing seal to check. Pumps introduce another movement that must be prevented during transit. Choose the simplest closure that works for the product and your hands.
Wide mouths are convenient for thicker products and cleaning, although they require careful closing after every refill. Very small openings can be frustrating with viscous conditioner. Meanwhile, a pouch-style bottle packs differently from a rigid bottle: it can lose bulk as the contents diminish, but it still needs protection from sharp objects and pressure on its cap.
Check the exact bottle, not just the set name
Mixed travel kits may contain both liquid bottles and small pots intended for dry items. Nalgene’s Medium Travel Kit, for example, distinguishes its bottles from storage jars, with different suitability and capacities. Do not assume that every piece in a kit has the same leak-resistance or meets the same cabin limit. [4]
On a narrow screen, swipe within the table to see every column.
| Container style | Useful starting point | Check before using |
|---|---|---|
| Original small tube | Products already sold in a useful size | Crimp, cap, instructions and remaining quantity |
| Refillable squeeze bottle | Compatible wash products | Ingredient restrictions, valve and cleaning access |
| Soft-sided toiletry bottle | A compact, shrinking wash kit | Cap engagement and formulation compatibility |
| Screw-top pot | Only products and uses the maker permits | Whether it is actually specified for liquids |
| Pump bottle | Products needing their original dispenser | Travel lock, overcap and accidental activation |
An attractive container is not automatically an improvement on a sound original tube.
Fill and label without creating a problem at the neck
Work with clean, completely dry equipment
Prepare containers according to their own care instructions rather than boiling every item or putting all lids in the dishwasher. Different plastics, coatings and seals tolerate different treatment. Use clean hands and any clean transfer tool permitted for the product. Work with one formula at a time so caps and labels cannot become mixed up.
Leave the manufacturer’s recommended filling space. Where there is no stated fill line, do not fill into the threads or force in the last spoonful. There is no universal, scientifically validated ’80 per cent full’ rule for every toiletry bottle. A smaller quantity in an appropriate container is usually more manageable than a brim-full bottle you need to wipe repeatedly.
Keep product away from the sealing surfaces
Before closing, wipe the neck and cap contact surfaces carefully. Product sitting across a seal can make it harder to identify whether the closure is properly seated. Close normally rather than using tools or excessive force, which can damage a lightweight cap.
Label the bottle with the product name and filling date. Add a simple morning/evening identifier only when helpful; colour alone can be difficult to distinguish in dim bathrooms. Avoid covering a printed capacity mark that airport staff may need to see.
Do not top up an unidentified residue from a previous holiday. Empty, clean and dry the container before a new permitted refill, and keep any remaining product separate from the original supply rather than pouring a questionable decant back into the full bottle.
Secure pumps and lids without relying on improvised seals
Use the mechanism the package was designed with
For a locking pump, follow the bottle’s own instructions and verify that ordinary pressure does not dispense anything once locked. Some pumps twist, some push down and twist, and some rely on a removable clip or overcap. An arrow on one bottle does not tell you how another bottle works.
Keep the original transport clip when one is supplied. An external overcap can protect a nozzle from being pressed, although it may not seal the liquid path. If the pump has no effective travel lock and the product must remain in that container, give it a protective position and its own secondary pouch.
Tape and cling film are not universal solutions
A small piece of removable tape can help keep a sound flip lid from catching on neighbouring items. It should be treated as a visible restraint, not as proof of a liquid-tight seal. Check that it will not obscure essential labelling or leave adhesive around a dispensing opening.
Putting cling film beneath a cap can interfere with an existing gasket, create a wrinkle across the sealing surface or stop the threads engaging properly. Unless the container maker recommends that method, prefer the intended seal and a separate pouch. Do not add plumbing tape, glue or improvised sealants to packaging that contacts cosmetics.
If a closure only seems reliable after elaborate wrapping, replace the faulty part or choose suitable original travel packaging. The most dependable packing routine is one you can repeat after a rushed shower, not only one that works when prepared meticulously at home.
Run a contained check before the suitcase is packed
Test gently and observe, rather than stress-testing to destruction
Set the closed bottle inside a washable tray. Check it upright, then on its side, and finally briefly with the cap down where the product and container instructions permit. Give a squeezable bottle only the light pressure expected during handling. Do not squeeze aerosols, glass containers or rigid packaging in an attempt to force a result.
Inspect the closure and the dry tray after each position. For a newly permitted product/container combination, a longer contained observation period may expose slow seepage. Record what was tested, especially when similar bottles hold different products. A small problem spotted here is much easier to address than one discovered after a long journey.
Understand the limits of a pass
A home check is a screening step, not a certification of leakproofness. It does not verify cosmetic preservation, simulate a flight or justify ignoring a manufacturer’s incompatible-product list. Also, testing with water alone will not establish that an oil, alcohol-containing formula or thick lotion behaves the same way.
Reject cracked packaging, a cap that does not seat squarely or a bottle that leaks during normal use. Replace the source of failure rather than moving it into a more expensive wash bag. Then test the complete packed arrangement: close the suitcase without sitting on it and check that the toiletries can be removed without forcing them past a hard shoe or charger.
Choose a secondary barrier that really contains liquid
A water-resistant lining is not a watertight closure
A toiletry organiser can have wipe-clean fabric and still allow liquid to escape through its zip or seams. Likewise, a clear cosmetics pouch is not necessarily approved for an airport’s liquids process. Assess containment and security presentation separately instead of relying on an ‘airport friendly’ label.
For a simple kit, an intact resealable pouch may be sufficient as a practical backup. Check its corners and closure, leave enough space to seal it comfortably, and replace it when worn. Separate a high-consequence item, such as a strongly coloured liquid, rather than allowing one spill to coat every bottle and brush.
Rolltop designs need room to close
Matador specifies that its FlatPak Waterproof Toiletry Case V2 must be rolled at least three times and buckled correctly for its stated waterproof performance. That means the usable packing arrangement must leave closure space; filling to the very top defeats the mechanism. Treat this as a manufacturer claim under the stated conditions, not a guarantee for every cosmetic or journey. [5]
For comparison, the BAGSMART Blast has organising features and a designated waterproof front pocket. That does not establish that the whole bag is a sealed spill vessel in every orientation. Choose it for access and organisation, with a separate barrier where needed. [6]
Containment should also be easy to inspect. An opaque rolltop works differently from a clear pouch: it may suit checked luggage well but require repacking for security checks on a cabin-only trip.
Position toiletries away from crushing forces
Use a protected zone, not a supposedly permanent upright position
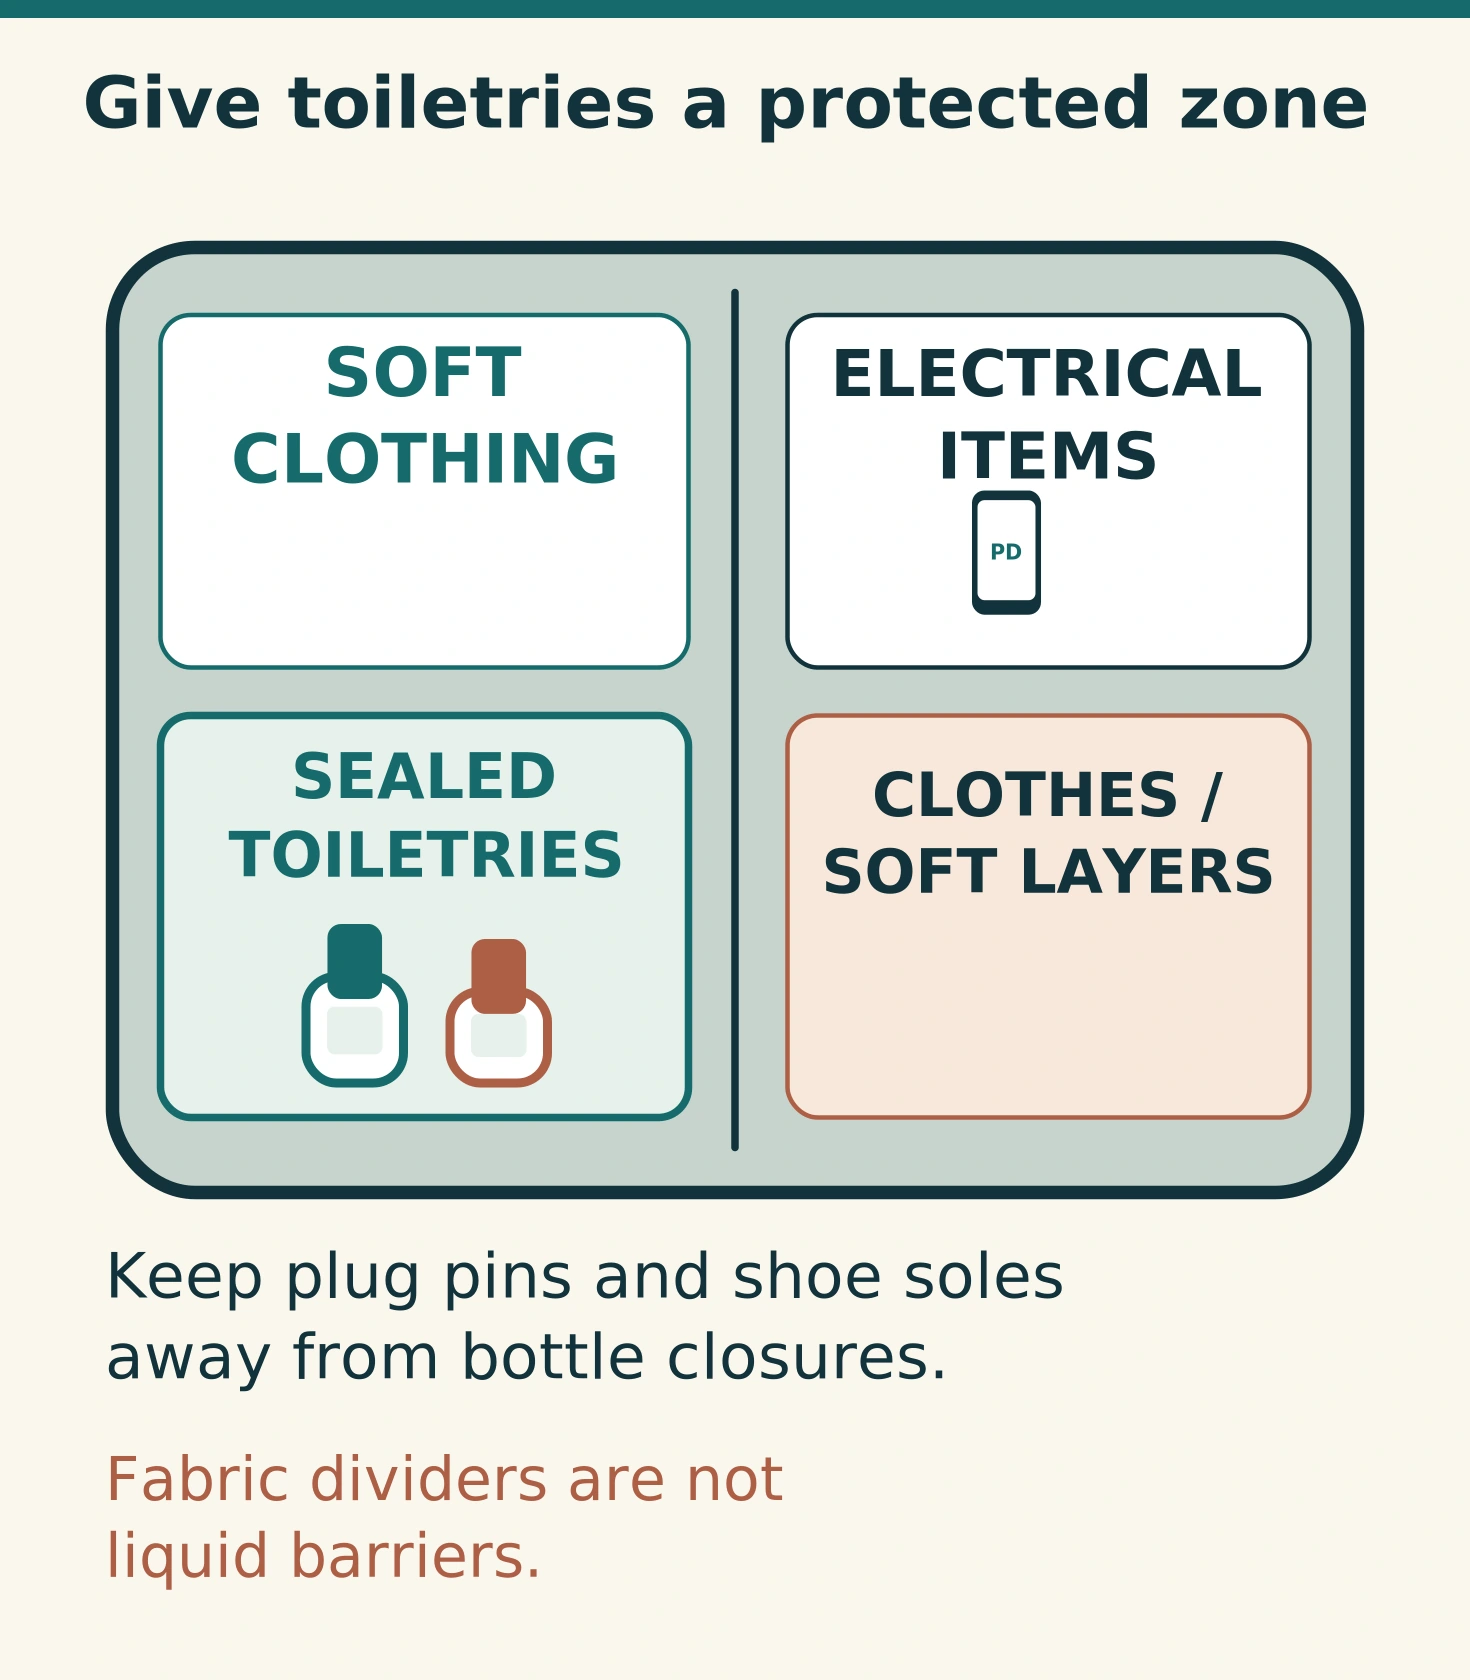
Place the sealed toiletries where surrounding soft items prevent them rattling, without squeezing the bottles. Keep cap ends away from shoe soles, plug pins, rigid cases and the ends of internal suitcase rails. A soft item can provide cushioning outside the sealed pouch, but a favourite jumper should not be the first line of leak protection.
Do not assume an upright suitcase remains upright. It may be laid on its back, put on its side or handled by a different carrying handle. The closure system must work without depending on a sticker or a particular orientation during the whole trip.
Keep consequential items out of the spill zone
Separate toiletries from passports, paper documents, medication, charging equipment and electronics. A divided suitcase does not necessarily provide a liquid barrier between its two halves. Zipped fabric dividers are primarily organisers, not proof that a spill cannot migrate.
In a carry-on, place any liquids pouch where it can be removed without unloading clothing. Once security is complete, close it again carefully rather than pushing loose bottles into a side pocket. For a checked case, retain the products you genuinely need during delays in your permitted cabin kit instead of concentrating everything in one wash bag.
Before closing the suitcase, run your hand over the outside of the toiletry pouch. A cap pressing sharply through the fabric is a signal to rearrange the load, not simply tighten the compression straps further.
Compare six useful products without buying a whole new system
These are research-led examples chosen for different jobs: dispensing, rigid bottle choice, flexible containment and bathroom organisation. They are alternatives or complementary layers, not a six-item shopping list. Product pages were checked on 15 October 2026; check the selected version, delivery and current availability before ordering.
On a narrow screen, swipe within the table to see every column.
| Product | Most useful role | Important limitation | Product listing |
|---|---|---|---|
| Go Travel Squeeze It Trio, ref. 662 | Three compatible wash products | Not for oils, hair serums or alcohol-containing products | Amazon UK listing |
| Matador FlatPak Toiletry Bottles, 90ml three-pack | A soft-sided wash kit | Alcohol-containing products excluded | Amazon UK listing |
| Nalgene Medium Travel Kit, eight pieces | Different bottle shapes and sizes | Jars and larger bottles need separate suitability checks | Amazon UK listing |
| Matador FlatPak Waterproof Toiletry Case V2 | A rolltop secondary barrier | Closure space and correct rolling are essential | Amazon UK listing |
| BAGSMART Blast 4.5L Hanging Toiletry Bag | Organised access at accommodation | Larger than a minimal cabin liquids pouch | BAGSMART UK listing |
| BAGSMART Crush Toiletry Bag | Separating a fuller personal-care kit | Not the differently named Crush Versatile model | BAGSMART UK listing |
Go Travel Squeeze It Trio: a straightforward wash-product set
Go Travel identifies ref. 662 as three 60ml silicone bottles with non-drip caps and rear suction cups. Its exclusions for oils, hair serums and alcohol-containing products are more decision-useful than a general leakproof slogan. [7]
I would consider this set for compatible shampoo, conditioner and wash, rather than for every liquid in the bathroom. Three bottles also impose a useful limit on how many ordinary wash products you decant. However, a suction cup is a convenience during use, not a transport restraint or a reason to skip secondary containment.
Matador FlatPak bottles: useful when the contents shrink
The Matador three-pack uses soft-sided containers; its technical specification gives 90ml per bottle. The maker excludes alcohol-containing products and requires hand washing rather than a dishwasher. [8]
Their packing advantage is most relevant when you carry modest amounts and want the bottle to occupy less space as it empties. They are less attractive when you need a rigid container that stands predictably on a shelf. Check the actual capacity marking: some marketing wording on the manufacturer’s page is inconsistent, so this guide uses the technical-specification figure and the matched listing.
Nalgene Medium Travel Kit: select pieces instead of packing the set
The eight-piece kit provides a range of containers, but the useful purchase question is which pieces you will actually use. Nalgene’s distinctions between bottles, jars and sizes mean that this is not a ready-made universal cabin kit. [4]
Its appeal is flexibility for different packing tasks, including journeys with checked luggage. For a short cabin-only break, buying a multi-piece set may add unwanted containers and leave the larger pieces at home. Select suitable liquid bottles and keep jars within their stated purpose; never infer leakproof performance just because the brand makes other leakproof bottles.
Matador Waterproof Toiletry Case V2: containment before compartments
This is the choice here for readers who prioritise a correctly closed secondary barrier over a set of internal organising pockets. The current V2 is a two-litre rolltop design; it is distinct from the earlier version and from Matador’s zippered toiletry case. [5]
The trade-off is access. You have to unroll it to reach the contents and leave enough spare material to close it properly afterwards. Do not buy it expecting a transparent one-litre security pouch, a rigid protective case or proof that incompatible products can be decanted safely.
BAGSMART Blast and Crush: choose by bathroom routine
The Blast’s hanging hook and elastic bottle organisation suit repeated access in a small bathroom. The Crush Toiletry Bag offers a wider, divided arrangement with separate front storage. Those are access differences rather than competing guarantees of total spill containment. [6] [9]
For either bag, measure the filled footprint against the space available in your suitcase. A generous organiser can quietly encourage you to take full-size items you never needed. Choose one that makes your existing kit easier to use, then keep vulnerable bottles in their own appropriate inner barrier.
Apply different checks to cabin and checked luggage
Security acceptance and leakage prevention are separate
At most UK airports, ordinary cabin liquids must be in containers no larger than 100ml, even when only partly full. Some airports allow larger containers, so check departure, transfer and return arrangements. [10]
Heathrow currently permits liquid containers up to two litres through its security process, but that is not a rule you can automatically apply to the next airport. Guidance was checked on 15 October 2026. [11]
A robust 150ml bottle may still be unsuitable for a route using a 100ml checkpoint. Conversely, a compliant miniature with a broken cap is still poor packing equipment. Plan around both requirements instead of choosing between them.
Checked baggage is not permission for unlimited toiletries
Dangerous-goods restrictions remain relevant for applicable medicinal and toiletry articles, including aerosols. CAA guidance specifies limits and requires aerosol release valves to be protected from accidental discharge. Check your airline as well as the airport before carrying unusual or larger products. [12]
Do not move an uncertain chemical into checked luggage and assume that solves the problem. Household solvents and industrial products are not made acceptable by describing them as toiletries. When a product is not clearly covered, ask the carrier or leave it out.
Treat perfume, oils and aerosols as individual packing problems
Keep thin or staining products separate
A face oil, perfume or strongly coloured wash can have consequences beyond a damp lining. Retain its original packaging where practical, protect glass from impact and give it a separate inner pouch. Check the product and container manufacturers’ instructions rather than assuming a bottle that holds shampoo is appropriate.
For a glass perfume bottle, prevent the spray head being pressed and cushion the bottle without letting the cap take the whole load. A small retail miniature can be simpler than a refillable atomiser when you cannot verify the refill mechanism or product compatibility. This is a packaging decision, not a recommendation to take more fragrance.
Protect aerosol actuators; do not improvise around pressure vessels
Use the original cap or another suitable manufacturer-approved means of preventing accidental release. Never puncture, dismantle, heat or transfer the contents of an aerosol to a general travel bottle. FAA guidance separately describes the limits for permitted personal medicinal and toiletry articles and the need to protect aerosol release devices. [13]
A plastic bag may contain a small liquid spill, but it is not a substitute for an intact aerosol can and protected valve. If a can is damaged, corroded or leaking, do not pack it. For optional styling products, leaving the aerosol at home may be the simplest way to reduce both bulk and packing complexity.
Keep the system working through hotels and the return journey
Re-close after use, not just before departure
A bottle that survived the outbound trip can still leak after a hurried refill or a shower with wet hands. Wipe the neck, confirm the lid is fully engaged and allow the outside to dry before replacing it in the pouch. Check that hair or product residue has not reached a seal.
Keep wet washcloths separate from bottle closures and dry toiletries. A damp pouch can disguise a new leak and makes it harder to tell where moisture originated. Open and dry appropriate organisers at the accommodation rather than leaving everything sealed until the next flight.
Avoid the last-morning overfill
Do not refill a bottle with the remaining hotel product simply because there is room in your suitcase. You may not know the formulation, its storage history or compatibility with the container. Likewise, do not mix a leftover decant with a different product to create one fuller bottle.
Leave a small amount of packing space for the return journey. Toiletry arrangements tend to change as bottles empty, shopping appears and laundry moves into a different compartment. Repeat the cap-pressure check after the bag has been repacked, especially when footwear has migrated into the former liquid zone.
At home, unpack the toiletries promptly, inspect the containers and clean them according to their instructions. A bottle that repeatedly fails should be removed from the travel kit rather than kept as an emergency spare.
Respond to a spill without spreading it further
Isolate first, clean second
Put the affected pouch on a washable surface, away from sockets and electrical items. Remove the leaking container and separate anything contaminated. Do not taste an unidentified liquid or assume that two products mixed inside a bag are safe to put back on your skin.
For an ordinary cosmetic spill on washable belongings, blot excess material with a suitable absorbent cloth before following the item’s care instructions. Test a compatible cleaning method on an inconspicuous area where the maker recommends it. Avoid adding bleach, solvents or multiple cleaning chemicals in an attempt to remove perfume or oily residue quickly.
Keep luggage care specific to the material
Samsonite advises different care approaches for luggage surfaces and materials. The lesson is not to treat a fabric lining, a leather trim and a hard shell as though they were the same washable surface. [14]
If liquid has reached a charger, battery or electronic device, stop using it and follow the manufacturer’s liquid-exposure guidance; a dry-looking exterior does not establish that the inside is safe. For a strong-smelling or unusual chemical spill during a journey, inform staff rather than opening and cleaning it in a crowded cabin.
After cleaning, investigate why the spill occurred before rebuilding the kit. Replacing only the pouch can hide the evidence while leaving the original faulty closure ready to fail again.
Weigh the advantages and drawbacks of extra protection
What the layered approach does well
It separates prevention from damage limitation. You can replace one weak bottle without buying a new organiser, keep high-consequence liquids away from electronics, and see which part of the system failed. It also works with modest existing equipment when the closures and pouches are sound.
What it costs in practice
Extra barriers take space, add opening steps and need drying. A rolltop may be awkward at security, while an oversized hanging bag can encourage overpacking. More packaging is not automatically safer if the case becomes so crowded that lids are compressed.
Choose the lightest arrangement that manages the consequences of your actual products. A weekend wash kit and a checked case containing several original glass bottles do not need identical solutions. However, both benefit from simple closures, clear labels and a sensible way to isolate a spill.
Avoid the mistakes that defeat otherwise sensible packing
Do not confuse labels with evidence
‘Leakproof’, ‘waterproof’ and ‘TSA approved’ are not interchangeable descriptions. Ask what is sealed, under which conditions, and whether the statement applies to the bottle, one pocket or the complete bag. Security staff retain discretion, and product marketing cannot guarantee acceptance.
Do not make the suitcase do the closing
A bottle held shut only because it is wedged tightly between clothes is not securely closed. Similarly, compression straps should hold the load in place, not press a pump down. Reorganise before adding tension.
The other avoidable mistake is keeping too many half-identified decants. Three familiar, suitable products are easier to check than twelve anonymous miniature pots. Put the product name on the container, discard unsuitable residues appropriately and review the kit when the trip changes rather than carrying the same collection indefinitely.
Frequently asked questions about leaking toiletries
Should bottles be completely full to remove the air?
Not as a universal rule. Filling into the neck can interfere with closure and leave no practical margin for handling or temperature changes. Follow any fill guidance for the specific container. Where none exists, avoid brim-filling and use secondary containment rather than relying on an exact percentage to guarantee success.
Is a zip-seal food bag enough?
An intact, suitably sized resealable bag can be a useful secondary barrier for ordinary compatible toiletries. It does not repair the bottle inside or prove resistance to every formulation. Check the seal and corners, close it without forcing the contents, and keep sharp objects away. Replace it when it becomes worn or contaminated.
Does storing the bottle upside down prevent leaks?
No single orientation prevents all leaks. Cap-down placement may expose a weak seal earlier during a contained check, but relying on one permanent orientation during travel is unrealistic. Use a closure that works properly and a separate barrier instead of assuming the suitcase will stay upright.
Can I take a bottle that only leaks when squeezed?
A flexible bottle that leaks under light, ordinary handling pressure is a poor candidate for a crowded suitcase. Inspect the closure and product compatibility, then replace it if the problem remains. A test pass is not compulsory proof of safety, but an obvious test failure is useful information you should not ignore.
Are solid toiletries always the answer?
Solids remove some liquid-dispensing problems, but they introduce their own issues, including wet-bar storage and whether the product suits you. Do not replace a familiar or prescribed product just to simplify packing. A suitable solid can be useful, while a sound original miniature may be the better choice for another part of the routine.
Can I reuse a miniature bottle from a hotel?
Only consider reuse when the container is suitable, can be cleaned and dried properly, and the intended contents are compatible. A bottle designed for one use or with a damaged closure may not tolerate repeated filling. Never treat an unlabelled, poorly cleaned miniature as a suitable home for medicines or sensitive formulations.
Final recommendation: spend effort on the weak point
For most travellers, the best starting system is a small number of suitable containers, properly closed, inside an intact secondary pouch and cushioned without compression. Keep packaging-sensitive products in their original containers. Check the entire route’s rules separately from the leak-prevention method.
Buy a new bottle when a closure or formulation match is wrong. Choose a dedicated rolltop barrier when the consequences of a spill justify it. Add a hanging organiser only when it genuinely improves bathroom access. These are different decisions, and one expensive product does not automatically solve all three.
The last useful action is a contained check of the actual products followed by a realistic packed-case check. You should be able to close the suitcase normally, remove the toiletries easily and identify every bottle. That is a more dependable routine than a collection of clever sealing tricks you cannot repeat on the way home.
Sources and fact-checking notes
Specifications and policy pages were reviewed on 15 October 2026. Manufacturer claims are identified as such. Practical arrangements are editorial recommendations, not laboratory results. Availability, regional variants and operator rules can change. Matador bottle capacity follows the 90ml technical specification rather than inconsistent marketing text; the waterproof case recommendation is specifically the current V2.
- FAA – dangerous-goods exceptions for passenger baggageTwo-page fact sheet; transport stresses discussed on page 1.
- humangear – GoToob+ compatibility and tipsContainer-specific exclusions and storage cautions; not a universal list for other brands.
- FDA – cosmetic shelf life and expiration datingHandling, storage, contamination and shelf-life factors.
- Nalgene – Medium Travel KitSix bottles plus two jars; jars are not recommended for liquid storage.
- Matador – FlatPak Waterproof Toiletry Case V2Current V2 model and rolltop closing instructions.
- BAGSMART UK – Blast 4.5L Hanging Toiletry BagOrganising pockets, hook and stated front-pocket construction.
- Go Travel – Squeeze It Trio, ref. 662Three 60ml bottles and formula exclusions.
- Matador – FlatPak Toiletry Bottles90ml technical specification used; other marketing copy contains an inconsistent capacity description.
- BAGSMART UK – Crush Toiletry BagCrush Toiletry Bag; not the separate Crush Versatile model.
- GOV.UK – hand-luggage liquids restrictionsAirport-specific liquids rules; check every checkpoint.
- Heathrow – hand baggage and liquidsHeathrow-specific security guidance, not a worldwide rule.
- UK CAA – baggage safety and restricted articlesCurrent toiletries and aerosol carriage guidance; airlines may impose further restrictions.
- FAA PackSafe – medicinal and toiletry articlesUS dangerous-goods guidance and protected aerosol release devices.
- Samsonite UK – product careChoose cleaning methods for the particular luggage material.
Illustrations in this article were created for Taylor’s Trailblazing Travel Gear. Third-party photographs, where used, are credited beside the image or in the source list.