How to Pack a Travel Backpack So It Stands Upright
Improve the footprint and balance of the bag you already own, without adding ballast or turning a laptop into a support panel.
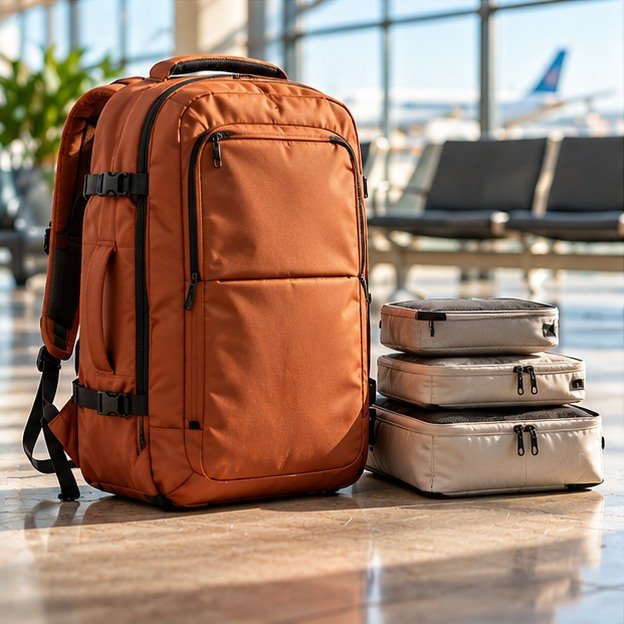
AI-created editorial illustration; a standing pose is not evidence of a particular backpack’s tested stability.
Learning to pack a travel backpack so it stands upright starts with the bottom of the bag, not with buying a heavier one. A rounded clothing bundle, a full front pocket or one large bottle can turn an otherwise manageable backpack into something that repeatedly falls forward or sideways.
The useful aim is reliable short-term placement while you remain beside the bag. It is not to make soft luggage behave like a rigid cabinet, and it is certainly not a reason to leave a bag unattended. Some backpack shapes will never stand consistently, however carefully they are packed.
This guide explains how to flatten the footprint, contain movement and balance the load without sacrificing carrying comfort or laptop protection. It includes a repeatable home check, different packing arrangements for common travel situations and a small selection of relevant bags and organisers. Most of the method can be tried with equipment you already own.
The physical explanation uses a simplified stability principle; the packing advice is research-led judgement rather than a tested performance claim. No featured backpack has been drop-tested or independently verified as self-standing for this article. When a stable upright position is unavailable, laying the bag down carefully is the better result, not a failure.
Spread the lower panel and use a modest soft clothing layer.
Preserve comfortable carrying rather than adding ballast.
Check the pocket or bundle that starts the lean.
A controlled resting position matters more than standing.
Pack a travel backpack so it stands upright: start with its footprint
Empty the backpack and look at the part that actually touches the floor. A broad-looking bottom panel may fold into a narrow ridge, while protruding seams, straps or a stuffed lower pocket can prevent it lying flat. Until that contact area is reasonably even, rearranging the top of the bag may achieve little.
Open the main compartment and gently spread the base into its intended shape. Clear any tucked fabric, loose strap or bunched lining. Then place a small, reasonably flat clothing bundle across the bottom so the bag can rest on a broad surface rather than on a single hard corner.
A flat base is not the same as a heavy base
Do not add books, a laptop or a large power bank merely to weigh the bottom down. You would be carrying extra weight to solve a parking problem, and the hard objects may create pressure points or an uncomfortable load. The aim is to support the existing shape with necessary belongings.
Add the rest of the packing gradually. After each substantial group, close the bag and observe what changes when it is set down gently. This makes the cause of a lean easier to identify than packing everything first and guessing which object is responsible.
If the empty bag has a rounded, narrow or deliberately curved base, recognise that design limitation early. You can often improve its behaviour, but there may be no upright arrangement worth preserving at the expense of comfort or protection.
Understand the balance problem without overcomplicating it
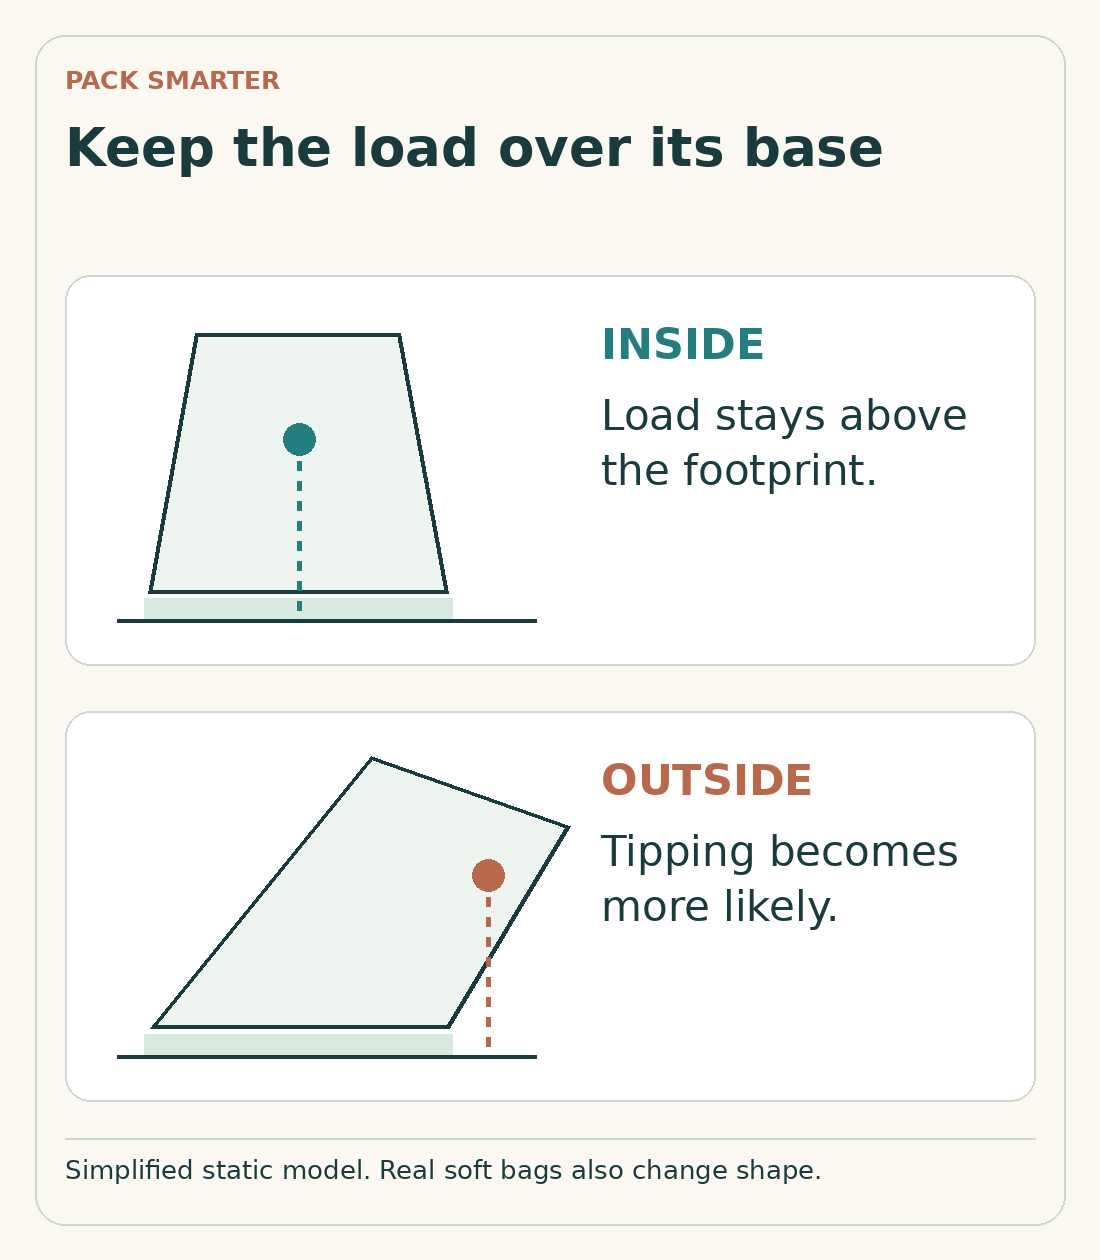
For a simplified rigid object on a level surface, stability depends on the combined centre of gravity remaining above its base of support. A wider base gives more room before a tilt carries that point beyond the support area; a high or off-centre load can make tipping easier. OpenStax explains this general principle. [1]
A soft backpack adds another variable: its base and body can deform. The apparent footprint may shrink when a rounded cube presses downward, or the front may bulge as clothing shifts. That is why a bag that stood when freshly packed can behave differently after a train journey.
Use the principle to find the cause, not calculate a guarantee
A forward fall suggests examining the front pocket, a forward-projecting base or a load that has migrated away from the rear panel. A sideways fall suggests looking at uneven side pockets, an off-centre shoe or a soft lower corner that has collapsed.
Those are diagnostic starting points, not universal rules. A stiff rear panel or an unusual harness can affect how a particular backpack rests. Observe the actual bag and change one thing at a time rather than applying a formula that assumes it is a rigid rectangular box.
The practical consequence is simple: improve the contact area and contain the load you already need. There is no reliable number of litres, kilograms or compression-strap turns that guarantees every backpack will stand.
Make carrying comfort the priority when placing heavier items
The best arrangement for a bag sitting on the floor is not automatically the best arrangement for wearing it. Putting every dense item at the very bottom may help one static test while making the pack awkward to carry. Similarly, a bag balanced by an excessive front load can pull away from your body.
Osprey recommends keeping heavier items close to the middle of your back, with lighter compressible items farther away or higher, and maintaining side-to-side balance. That provides a sensible carrying principle to preserve while you improve the base. [2]
Separate the carrying layout from the parking decision
Use a modest soft lower layer to shape the base, then keep the denser necessary kit controlled nearer the rear middle. Put lighter items above or around it without creating a large top-heavy bundle. This is a starting arrangement to test, not a prescription for every bag and body.
When you arrive, assess whether the backpack stands safely in that comfortable configuration. If not, lay it down, hold it or place it securely where permitted. Do not rebuild the whole load around floor-standing behaviour when you will spend much longer carrying it.
A laptop deserves special treatment. Keep it in a suitable protected compartment, not at the bottom as a structural board or weight. Dell’s transport guidance cautions against pressure from overfilled bags; stability should never be purchased by clamping or loading the computer. [12]
Build the base with a flat clothing layer
A thin, evenly filled cube or a folded soft garment can help the bottom panel retain its intended shape. Choose something that occupies much of the usable width without being forced into the corners. A rounded cylinder or overstuffed cube is less helpful when it makes the bag rock on a central bulge.
Set the item in place and feel the underside. The base should remain reasonably even, with no hard lump protruding through the fabric. Close the bag lightly and observe the resting position before adding the next layer.
Fit the shape rather than filling every possible gap
A cube narrower than the base may leave one corner unsupported. However, stuffing that corner aggressively can create a new lump or push the bag beyond its normal dimensions. Try redistributing existing soft clothing instead of treating every space as something that must be tightly filled.
Likewise, do not assume a rectangular organiser remains rectangular when heavily loaded. Compression can make its edges thin while leaving a domed centre. Reduce the contents or rearrange the folds if that dome becomes the bag’s main contact point.
Leave the base arrangement easy to restore. A complicated collection of socks packed into exact corners may work once but fall apart whenever you remove clothing. One simple, repeatable lower layer is more practical than a delicate packing puzzle that cannot survive a normal overnight stop.
Stop the contents sliding when the backpack changes orientation
A travel backpack is carried, lifted, placed on a seat and sometimes laid flat for access. Its internal load moves through those changes. If heavy objects are loose in a large cavity, the upright balance can change even though you have not deliberately repacked anything.
Use existing internal straps, modest organisers or sensible pocket placement to limit that movement. Keep the largest dense item from rolling into an unsupported corner. Arrange the remaining contents so they are contained without being squeezed into a rigid block.
Tighten straps just enough to control the load
External compression straps can reduce movement and bring the bag closer to its intended profile. However, excessive tension may pull the lower corners inward, round the front of the bag or press against a laptop. Close the main compartment normally, then make small adjustments and inspect the resulting shape.
Try the bag both upright and in the orientation used for access. Remove one commonly needed item and replace it. If the whole arrangement collapses or requires re-threading several straps, simplify it before the journey.
Osprey also warns that loose items attached outside can interfere with balance, especially when they swing. Keep dangling footwear, mugs and heavy accessories contained where possible. Tidying the exterior is often a more useful change than finding another place to squeeze the main clothing cube. [2]
Balance bottles, front pockets and the small items that accumulate
One full bottle can create a noticeable side-to-side difference in a compact bag. If the backpack leans towards it, first check the bottle pocket and the lower corner beneath it. The answer may be moving the bottle to a more suitable location, not adding another heavy object on the opposite side.
Do not add weight simply to balance weight. Use the necessary items already travelling with you, keep them secure and maintain separation from electronics. An empty bottle during part of the journey will change the balance again, so avoid an arrangement that works only when two containers are equally full.
Inspect the front and top pockets individually
A large front pocket can become a collection point for a charger, headphones, glasses case and snacks. Each item seems modest on its own, but together they can pull the bag forward. Keep only the items you actually need quickly in that location.
The same applies to a top compartment. Put light, small essentials there rather than treating it as a spare technology pouch. Move a dense charger closer to the controlled main load, without placing it against a laptop or an unprotected edge.
When the bag begins leaning during the day, check these pockets before rebuilding the entire main compartment. A water refill, a recently added purchase or a charger moved after use may explain the change. Restoring the earlier arrangement is often enough.
Use a simple diagnostic table when the bag keeps falling
Observe the direction and timing of the problem. A bag that falls immediately after being packed has a different issue from one that stands until you open a compartment. Do the checks on a low, clear, level surface and stay close enough to prevent a fall.
| What happens | Check first | A practical adjustment |
|---|---|---|
| Falls forward | Front pocket and a rounded lower bundle | Move dense accessories inward; flatten the base layer |
| Falls towards one side | Bottle pocket, shoes and an unsupported corner | Reposition necessary items and restore an even footprint |
| Rocks rather than leans | A hard object or seam beneath the base | Remove the obstruction and spread the lower panel |
| Stands full but collapses partly empty | Soft structure and excess loose space | Use fewer loose bundles; lay flat when structure is insufficient |
| Falls when opened | The opening panel moving the load outward | Open the bag flat instead of forcing upright access |
| Changes after carrying | Sliding contents or straps altering the shape | Contain the load and reassess modest strap tension |
Change one variable before trying another
Move the suspected item, close the backpack and repeat the observation. If you change the base, pockets and straps at the same time, you will not know which change helped. The aim is a repeatable arrangement you can restore quickly during the trip.
Record the result in ordinary terms: stands with the bottle removed, rocks with the shoe at the bottom, or needs to lie flat when opened. That practical description is more useful than declaring the backpack universally stable or unstable.
Compare products by the problem they address
These examples are selected for published shape, layout or organisation features, not a claimed ranking of self-standing performance. Start with your existing bag and buy only when a specific limitation remains after repacking.
| Product | Why it is relevant | What it does not establish | Product listing |
|---|---|---|---|
| CABINZERO Classic Backpack 28L | Rectangular published footprint and side compression straps [3] | It has not been tested with your load | Classic 28L at Amazon UK |
| Osprey Daylite Expandable Travel Pack 26+6 | Flexible main compartment and compression options [4] | Expansion is not a stability guarantee | Daylite 26+6 at Case Luggage |
| TORRO 17.5L Commuter Laptop Backpack | Separate access areas illustrate a more compartmentalised layout [5] | A laptop pocket is not a structural prop | 17.5L Commuter at TORRO |
| Thule Compression Packing Cube Small | A compact rectangular clothing organiser [6] | Filling it tightly can still produce a rounded bundle | Thule Small cube at Amazon UK |
| Peak Design Packing Cube Small | Separate clean-and-used clothing areas [8] | The divider does not prevent every change in shape | Peak Design Small cube at Amazon UK |
| BAGSMART Bubble Electronic Organizer | Keeps a modest charging kit contained [9] | Fabric does not make hard contents harmless | Bubble organiser at BAGSMART UK |
Confirm the exact size and version when ordering. The table identifies possible tools for specific packing problems; it does not mean every traveller needs all six or that any product will keep a bag upright on an unsuitable surface.
CABINZERO and Osprey: two different reasons to consider a bag
CABINZERO’s current Classic 28L page describes side compression straps and a clamshell opening. Its published 39 x 29.5 x 20cm footprint makes it a useful shape to inspect when a shorter rectangular bag suits your journey. Those features do not establish a tested guarantee that the backpack will stand upright. [3]
Before buying for a more rectangular shape, consider the conditions in which you want it to stand. A partly empty bag, a large bottle in one side pocket or an opened front panel can behave differently from a fully packed display example. Ask about the current version and trial your own load under the retailer’s return conditions.
Daylite expansion serves capacity, not a promise of upright balance
The Osprey Daylite 26+6 is relevant when you want flexible packing space and a straightforward main compartment. Opening the expansion changes the bag’s overall shape and the way contents can sit, so assess expanded and unexpanded loads separately. It is not included as a verified self-standing model. [4]
I would consider it for its travel layout first and treat floor-standing behaviour as a secondary trial. If it carries comfortably but does not stand with your necessary load, laying it down may remain the better solution. Buying a different backpack purely to avoid that small inconvenience can be disproportionate.
Choose cubes that support the load without becoming hard bricks
A small organiser can give clothing a more repeatable shape. Thule’s small compression cube is listed at 26 x 18 x 11cm expanded, with a second zip that draws the sides together. Use those measurements to assess the fit of the organiser, not as a prediction of how much clothing you can force into it. [6]
For a backpack base, spread a modest clothing load evenly before closing the cube. A tightly domed centre can make the bag rock even when the cube’s corners look thin. Sometimes leaving the compression zip partly or fully open gives the lower layer a better shape.
A laundry divider addresses organisation, not structural rigidity
Peak Design’s Packing Cube uses separate clean-and-used clothing compartments with a movable divider. That can help preserve a defined place for clothing as the trip progresses, although the shape will still change with the contents. It is useful for managing the load rather than stiffening the backpack. [8]
Keep the small size proportional to the bag. A larger cube that fills the whole base can block access or force the backpack into an unsuitable outline. The correct organiser is the one that fits without turning into the dominant structural object in the bag.
BAGSMART’s six-piece compression set offers another way to organise clothing, but measure the relevant pieces before assuming a fit. The UK listing does not clearly establish every component’s dimensions. A manufacturer check is more useful than buying an entire set to solve one unsupported corner. [7]
Control the technology load without using it as a counterweight
Chargers and adapters can shift into the lower corners when left loose. A modest organiser keeps them together, making their position easier to manage. BAGSMART’s Bubble Electronic Organizer is one example, with a published 21 x 13.5 x 5.8cm exterior. [9]
Put the pouch where it belongs for carrying and access, not wherever it acts as a counterweight. Its contents remain hard, so keep it away from laptop surfaces and lower edges. If the bag only stands when the charging kit is pressed against the computer, choose a different parking position.
A compartmentalised bag still needs deliberate packing
TORRO’s 17.5L Commuter illustrates a backpack with separate laptop and lower storage areas. That organisation can make it easier to know where each group of belongings sits, but it does not mean every compartment should be fully loaded. A dense object in the wrong pocket can still change the balance. [5]
Keep a computer flat in its suitable protected area and leave the surrounding load relaxed. Do not insert it as a rigid backboard to hold up an otherwise floppy bag. The device’s safe transport matters more than whether the backpack can pose upright beside a chair. [12]
When technology dominates the load, prioritise a comfortable, protected carrying arrangement. A bag laid flat beside you is preferable to one that stands by concentrating pressure on expensive equipment.
Adapt the method for three common travel situations
For a hotel weekend, a simple lower clothing bundle with a second modest group above it is usually easier to restore than many small loose rolls. Keep your transit layer accessible and return used clothing to a defined place. The lower layer can then remain reasonably consistent as you change outfits.
For a work trip, the laptop and charger constrain the layout. Position those safely first, then use clothing to occupy the remaining flexible spaces without clamping the device. If the bag is too slim to stand with that arrangement, accept a horizontal resting position.
A partly empty day bag needs a different expectation
After leaving clothes in the hotel, a travel backpack may contain only a jacket, bottle and small pouch. A soft body can slump because it no longer has enough contents to hold its shape. Do not add unnecessary items just to recreate the full travel silhouette.
Try using the bag’s intended compression features to contain the reduced load without folding the base into a ridge. When that does not work, hold the bag, lean it safely against a permitted fixed surface while staying beside it, or lay it down where it cannot obstruct anyone.
During shopping or a day out, reassess after adding purchases. A single dense item placed at the top can change behaviour more than several light garments. Make a brief adjustment when convenient rather than continuing with a bag that repeatedly falls whenever you stop.
Choose a safe place to put the backpack
A packing arrangement cannot compensate for an unsuitable surface. Avoid slopes, narrow ledges, moving seats and crowded circulation areas. Stand beside the bag and check that straps cannot catch a passer-by or become trapped under furniture.
On trains and aircraft, follow the operator’s stowage rules rather than trying to keep the backpack upright for convenience. The bag may need to lie beneath a seat or in a designated luggage area. Upright presentation is not a transport requirement and should not override safe stowage.
Do not make soft luggage into a trip hazard
A bag can stand securely yet still be badly placed. Keep it out of aisles, doorways and paths used by other passengers. A broad base occupies floor space, and loose shoulder straps can extend farther than the visible body of the bag.
When opening a front-loading backpack, laying it flat is often the more controllable option. The opened panel and shifted contents can change the balance abruptly. Support the bag and use an appropriate surface rather than assuming its closed standing position will survive full access.
Never leave a backpack standing unattended simply because it passed a home check. The purpose of the method is to make short stops easier while you remain with your belongings, not to create an independent storage fixture.
Test the arrangement without dropping or damaging anything
Use a clear floor-level area at home. Pack your normal load, close the bag, set it down gently and remain close. Observe whether it settles evenly, leans gradually or starts to fall as soon as your hand leaves it. Catch or support it before anything hits the floor.
Do not deliberately shove it, balance it on an edge or perform a drop test with electronics inside. You are checking an everyday arrangement, not measuring impact resistance or proving a manufacturer’s performance claim.
Repeat after the changes that happen during travel
Remove the bottle, retrieve a clothing item, open the front pocket and then restore the bag. Test one change at a time. Record which version needs a different resting position so you know what to expect away from home.
Also try the lighter day-bag load and the less tidy return load. If the full backpack stands but the half-empty one does not, that may simply be the useful limit of the design. A predictable limit is more valuable than a fragile arrangement that works only under ideal conditions.
Finally, put the bag on and check carrying comfort again. Improving the floor footprint should not create a hard lump against your back or a lopsided shoulder load. Keep only the changes that help the overall journey.

Know when repacking has reached its limit
A narrow base, curved back panel or very soft shell can limit upright behaviour. Broken structure, distorted seams or a damaged lower panel can make it worse. Repacking is not a repair for a construction problem, and adding improvised rigid material may create sharp edges or interfere with the bag’s intended use.
Before buying a replacement, decide how often standing really matters. A backpack that carries comfortably and works well under a seat may still be a good choice despite needing to lie flat beside you. A frequent work routine with repeated floor access may justify prioritising a more structured design instead.
Benefits of improving the existing layout
Better control of shifting items, less reliance on overfilled pockets and a more repeatable packing routine. It can improve short-stop handling without adding equipment or weight.
Limits to accept
Soft bags change shape, partly empty loads may slump and opening a front panel can remove the balance. Some designs are better carried and laid down than forced to stand.
Do not permanently modify a bag to solve a temporary packing issue. Check the maker’s guidance and warranty conditions before adding panels or altering straps. A removable organiser that solves another useful job is generally easier to assess than a homemade structure that changes the whole backpack.
Common mistakes that make stability worse
Overcompressing the base is an easy mistake: the bag looks smaller but now rests on a rounded bundle. Release some tension, redistribute the clothing and see whether the actual contact area improves. Compression is a tool for containing contents, not an instruction to make everything as tight as possible.
Another mistake is adding a heavy object as ballast. That may change one standing test but increases what you must carry and may create a hard point beneath other items. Reposition necessary belongings or choose a safer resting orientation instead.
Keep airline fit in the picture
A wider or deeper load may stand more easily while exceeding your booked dimensions. Ryanair’s small bag is currently 40 x 30 x 20cm; easyJet’s small under-seat bag is 45 x 36 x 20cm. Recheck the finished exterior after changing the base and pockets. [10][11]
Avoid relying on a tightly closed front pocket to hold the shape together if you open it repeatedly during the journey. The arrangement should work with normal use or have an obvious safe alternative, such as laying the bag down for access.
Finally, do not treat a self-standing marketing phrase as a guarantee for every load. Ask what the claim actually describes, examine the current product and test your own belongings. The practical outcome matters more than the label.
Frequently asked questions
Why does my backpack stand when full but not when half empty?
The contents may be supporting a soft body that cannot hold the same shape by itself. When you remove clothing, the base or sides can collapse and the remaining items can shift. Use the intended compression features modestly, but accept a flat resting position when a light load cannot support the structure.
Should the heaviest item always go at the bottom?
No. Carrying comfort and protection still matter. Osprey recommends denser items near the middle of the back and balanced side to side. Use a suitable soft lower layer to shape the base, rather than moving every heavy object downward or adding unnecessary ballast. [2]
Can I use my laptop to stiffen the backpack?
Do not treat the laptop as a structural panel, wedge or counterweight. Keep it in a suitable protected compartment, clear of concentrated pressure and hard objects. When the bag only stands by loading the computer, lay the bag down or change the packing arrangement. [12]
Will compression cubes make any backpack stand?
No. They can make clothing easier to contain and help create a repeatable shape, but an overfilled cube can also form a rounded base. Their effect depends on the backpack and load. Try one suitable organiser before buying a set specifically for stability.
Is a backpack with a flat base guaranteed to stay upright?
No. A flat base helps only when the load, surface and bag structure also cooperate. A full side pocket or opened front panel can still shift the balance. Treat the shape as one useful design feature, not a guarantee against tipping.
Can I make a roll-top backpack stand reliably?
Possibly, depending on its base and construction, but do not assume the closure style decides the answer. A loosely filled upper section can slump, while rolling it too tightly may distort the whole bag. Assess its intended packing range and use a safe alternative when the reduced load will not stand.
What is the simplest no-purchase improvement?
Empty the front and side pockets, flatten the bottom and repack a modest soft base layer. Add the necessary contents gradually, watching when the lean appears. This often reveals a misplaced dense item or a rounded lower bundle without requiring a different bag.
The recommendation: a better load, not extra weight
Start with a flat footprint and a simple lower clothing layer, then control the necessary load near the rear middle of the backpack. Keep side pockets balanced, hard accessories contained and external straps tidy. Recheck the arrangement after ordinary access and after removing clothing for the day.
Do not compromise laptop safety, carrying comfort or airline dimensions for a bag that stands neatly. The useful goal is predictable handling, including knowing when the backpack needs to lie down.
A product with a more suitable base or organiser may help when a specific limitation remains, but repacking should come first. If the existing backpack carries well and only needs a safe horizontal resting place, it may already be doing its main job perfectly adequately.
Sources and fact-checking notes
The balance diagram applies a simplified physical principle to a soft, changing load. It is not a tested tipping model. Product examples were selected for layout and organisation features; no featured backpack has been independently verified to stand with every load. Sources reviewed on 15 October 2026.
- OpenStax, College Physics 2e: stability and the base of support
- Osprey: how to pack your backpack
- CABINZERO: Classic Backpack 28L specifications
- Osprey: Daylite Expandable Travel Pack 26+6 specifications
- TORRO: 17.5L Commuter Laptop Backpack
- Thule: Compression Packing Cube Small, TCPC201 size specifications
- BAGSMART UK: Compression Packing Cubes 6 PCS
- Peak Design: Packing Cube range and compression design
- BAGSMART UK: Bubble Electronic Organizer
- Ryanair: current bag policy
- easyJet: cabin bags
- Dell: laptop care and transportation guidance
Illustrations in this article were created for Taylor’s Trailblazing Travel Gear. Third-party photographs, where used, are credited beside the image or in the source list.