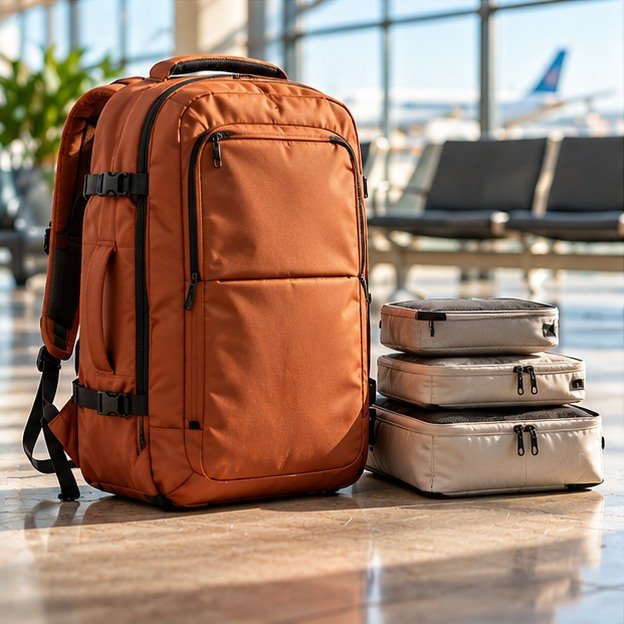

Clamshell vs Top-Loading Travel Backpacks
Choose the opening that works at the hotel, in the queue and halfway through your journey.
Original access-layout concept, not a photograph of the named products.
The choice between clamshell vs top-loading travel backpacks becomes clearer when you picture yourself looking for one item, not admiring an empty bag. At a hotel, a broad opening can make clothing easy to arrange. On a crowded train, the same bag may need to stay upright while you reach for a charger. A good purchase balances both situations rather than winning only the packing photograph.
Opening style describes access, not overall quality. A clamshell bag can be uncomfortable, a top-loader can have excellent organisation, and either can be too large for the allowance you booked. This comparison separates the main compartment from laptop panels, outer pockets and secondary zips so you can evaluate the part of the bag you will actually use.
The examples are research-led design references selected for contrasting access layouts and current published specifications. They are not a hands-on ranking. Where a retailer’s selected variant was unavailable, that limitation is stated. Measurements come from the identified sources; practical packing routines and scenarios are editorial suggestions rather than measured test results.
This article contains affiliate links. If you buy through them, Taylor’s Trailblazing Travel Gear may earn a commission at no extra cost to you. Recommendations and practical comparisons are research-led; no hands-on product testing is claimed.
Start with clamshell
A broad opening helps you see the whole packing area.
Consider a top-loader
Keep frequently used items near the top or in separate pockets.
The main compartment
A laptop panel opening flat is not the same as the clothing section opening flat.
Carry the intended load
Opening style does not determine harness comfort.
Clamshell vs top-loading travel backpacks: what changes in practice?
A broad opening changes how you see the contents
A clamshell-style main compartment opens far enough to expose a substantial part of the packing area. You can normally arrange clothing groups side by side, see gaps and remove an item without first lifting everything above it. Some designs divide the volume into two shallow halves; others provide a deep tub with a flatter opening panel. Those arrangements do not behave identically.
Think about the contents you need to see together. Two clothing cubes, a toiletry pouch and spare shoes benefit from a broad view during packing. However, the same layout needs a suitable place to open. A bag spread across a narrow chair or balanced on your knees can be less convenient than the product photographs suggest.
A top opening encourages a vertical system
A top-loader is accessed primarily from above, often through a drawcord and lid or a roll-top closure. A simple zip across the upper edge is another top-access arrangement, although retailers do not always use the terms consistently. The useful question is how far your hand must travel to reach the lowest item and what you must move to get there.
This design can work well when your kit is deliberately layered. Put items needed late in the day lower down, and keep the next-use layer or snack accessible. A lid pocket, side zip or separate device opening can transform usability, so do not dismiss the whole category as one deep sack. Examine the actual access points.
Check which compartment really opens flat
Laptop access is not clothing access
A product can advertise a 180-degree opening because its laptop section folds away from the back panel. That does not necessarily expose the clothing compartment. Look for photographs showing the main packing space open, not just a device sleeve lying flat beside the bag. Trace the zip around the perimeter and check what remains covered by mesh or fabric.
The BAGSMART Blast 28L illustrates why reading separate sections helps: its current page describes a 180-degree laptop compartment and also lists a full-clamshell opening among the main features. Those are two distinct claims. Confirm the current version and view the relevant compartment rather than assuming the first ‘opens flat’ label answers every access question. [1]
Distinguish panel loading from a divided suitcase layout
A large front panel may open widely while leaving the contents in one deep chamber. That can be excellent for travel without looking like two equal suitcase halves. Conversely, a divided bag may give you two neat surfaces but less flexibility for one bulky item. Neither is inherently better; they solve different packing problems.
Use practical language when comparing bags: ‘main chamber fully visible’, ‘bottom reachable through side zip’ or ‘device section separate’. These descriptions survive inconsistent marketing terminology. They also help when you ask a retailer a question, because the staff member can show the actual opening instead of simply repeating a category label.
Compare the access patterns before the products
Start with the job you need the bag to do
The following table compares typical layouts, not promises about every backpack using the label. Additional pockets, internal dividers and the stiffness of the fabric can change the result. Use it to create a shortlist of questions, then check the exact candidate.
| Layout | Where it helps | What can become awkward | Useful question |
|---|---|---|---|
| Full main-compartment clamshell | Clothing organisation and checking the whole load | Opening widely in a cramped place | Can I get daily essentials without opening the main zip? |
| Wide panel opening | Flexible packing with one deeper chamber | Items can still sit behind one another | How much of the lower chamber can I reach? |
| Drawcord top-loader with lid | Upright access to a layered day kit | An item buried at the bottom | Is there a separate pocket for what I need repeatedly? |
| Roll-top with side access | Adjustable closure and another retrieval route | Several closures to manage | Does the side zip reach the item I actually need? |
| Divided two-half layout | Keeping groups separated and visible | Large objects that cross the divide | Can the divider move, or is the split permanent? |
Do not mistake an extra zip for an automatic improvement
Every access route should have a purpose. A side zip that reaches only a narrow part of the chamber may not help with a broad laptop pouch. An extra pocket can also consume space you expected to use for clothing. Openings are useful when they reduce the steps needed to retrieve your own items, not simply because there are more of them.

Pack clothing in a way that matches the opening
Use a clamshell to establish an arrangement you can repeat
With a broad main opening, lay out the larger clothing groups first. Leave a practical route to any pocket you will use during the journey. Avoid filling every visible gap with a different small object; that can turn an apparently organised bag into a collection of loose items the first time you remove a cube.
A couple of appropriately sized organisers can be enough. BAGSMART compression packing cubes are an optional example to compare with bags you already own. Their purpose here is grouping, not a promised percentage reduction in volume. A cube must fit the chamber and pass through its opening after it is packed, not merely when it lies empty. [2]
The selected Light Blue set was awaiting availability when checked on 11 October 2026. Compare the arrangement, but do not make a time-sensitive packing plan around that offer.
Layer a top-loader around retrieval order
Put the items you expect to need least often lower down, provided their weight and shape also make sense there. Keep a frequently used layer near the opening and a small essentials pouch in a predictable pocket. Avoid letting a dense charger pouch or toiletry bottle settle into a corner where it becomes uncomfortable against your back.
Try removing the lowest planned item while the bag remains upright. Count what has to come out first, not how quickly you can empty the whole bag. If the answer is ‘nearly everything’, either change the arrangement or decide that this design is better suited to a different trip. Packing skill should not become a daily battle with the opening.
Think about the room where you will unpack
Hotels favour some layouts, but space still matters
A clamshell makes sense when you can place the bag on a clean luggage rack or another suitable surface. You can open it, identify the clothing group you need and close it again without unpacking into drawers. That can suit a sequence of short hotel stays where you prefer to keep belongings together.
However, check the open footprint. A narrow rack may support only one side, leaving the other half hanging awkwardly. A bag with a deep base and lightweight lid behaves differently from one with two heavily packed halves. Imagine where each part rests before assuming that ‘opens like a suitcase’ means it works on every rack.
Shared rooms reward controlled retrieval
In a hostel or small shared room, you may want to take out one pouch without displaying the rest of your belongings. A top-loader with well-planned layers can be convenient, while a clamshell with separate quick-access pockets can achieve the same result. The deciding factor is often the pocket arrangement rather than the broad category.
Avoid using a public floor as your default unpacking surface. Keep the items needed during the journey separate from your main clothing arrangement. When you need only a charger or light layer, neither design should force you to reveal the entire trip’s kit. This is a practical privacy benefit, not a claim that the bag prevents theft.
Compare standing access and seat-side access
A queue is different from a bedroom
Practise retrieving a small item with the bag upright and supported safely. You should not need to hold it by one strap while opening the whole main compartment. For a top-loader, check that the lid or rolled closure does not obstruct the pocket you use most often. For a clamshell, see whether you can open only the upper portion without allowing contents to shift out.
Do not depend on balancing a fully open backpack against your legs. In a busy setting, one simple pouch near the top often provides more benefit than an elaborate internal arrangement. Put travel documents and frequently used technology where you can reach them without moving the clothing load.
Consider the bag’s orientation under a seat
An underseat bag may be lying on a different face from the one you pictured while packing. A pocket that is convenient when standing can end up against the floor or beyond your reach. Check how the bag will be orientated and which handle is easiest to grasp when pulling it towards you.
Keep liquids secured and fragile items protected regardless of opening style. A clamshell zip that runs around three sides should remain closed during stowage; a top opening needs its intended closure properly secured. Neither the main zipper nor a rolled mouth should be left partly open merely to make later access faster.
Evaluate the harness independently
Opening style cannot tell you how a pack will carry
Shoulder-strap shape, back-panel length, adjustment range and the location of dense contents all affect the experience. A top-loader is not automatically a hiking pack with a supportive hipbelt. A clamshell is not automatically uncomfortable because it looks rectangular. Compare the actual carrying system rather than importing expectations from the opening.
Try the intended load when the seller permits an appropriate trial. Adjust both shoulder straps and any relevant sternum strap according to the instructions. Notice whether you can move naturally and whether an internal object creates a pressure point. More padding does not necessarily solve poor fit or an awkwardly placed hard item.
Keep the load close and stable
Put dense items in a position that is secure and sensible for the specific bag. Avoid making the opening panel disproportionately heavy, especially in a divided layout, because that can affect how the pack rests when opened. In a taller top-loader, stop items migrating into an unstable pile at the very top.
The purpose of a hipbelt also needs checking. A thin webbing strap may mainly stabilise the bag, while another design is intended to transfer more load. Do not treat the presence of any belt as proof of the same support. Ask what the maker intended and judge whether the complete pack suits your normal carrying needs.
Waterproofing is a separate specification
An opening can help or hinder without proving a rating
A lid can shelter the top of a bag, and a rolled closure can reduce a direct path into the main chamber when used correctly. Nevertheless, seams, fabric, zips and the rest of the construction still matter. Do not turn a general claim of water resistance into a promise that a backpack protects electronics through sustained rain or immersion.
The Skule Top 26 is described by Fjallraven as using water-repellent fabric; that is not an immersion claim. Likewise, the Soar page mixes water-repellent and waterproof wording around different components. This article does not interpret a zipper description as proof that the entire Soar backpack is waterproof. [3] [4]
Build protection around the consequence of a leak
For vulnerable electronics, consider a suitable internal protective layer in addition to the backpack’s normal closure. Keep wet clothing separate from dry kit rather than assuming a coating will manage moisture already inside. A rain cover can help in some conditions, but only use one that fits and follow its own limitations.
Think about what happens when you open the pack in rain. A large exposed clamshell gives water more opportunity to reach the contents; a top-loader can still admit water while you search. Find shelter before opening when possible and keep the next-needed item accessible so you are not rearranging the whole bag in poor weather.
Airline fit depends on the packed dimensions
Treat underseat and overhead allowances separately
On 11 October 2026, Ryanair’s published small personal-bag limit was 40 x 30 x 20cm, while easyJet’s was 45 x 36 x 20cm. The larger cabin-bag allowances are different and depend on what is included or added to the booking. Neither carrier decides fit from a backpack’s opening style or advertised litre figure. [5] [6]
Measure the packed bag, including rigid structure and filled outer pockets. A rolled closure must be secured in its intended configuration; leaving it loosely extended to gain room can change the dimensions. Expansion on a clamshell-style travel pack similarly creates a new size that needs a fresh allowance check.
Use a simple dimensional comparison before discussing compression
The published Soar dimensions are 43 x 26 x 23cm, so its stated depth is already beyond either of those 20cm small-bag limits. That does not become a guaranteed fit because the fabric is flexible. The Blast 28L’s stated 20.5cm depth also deserves attention rather than being rounded down. [4] [1]
A soft bag may pack differently, but only the final appropriately packed result can answer a particular size question. Do not buy an unsuitable candidate on the expectation that gate staff will overlook the difference. Recheck the live carrier rules and your booking rather than treating this dated comparison as permanent approval.
Current clamshell examples and what to inspect
Read the numbers alongside the opening
These examples were selected for accessible UK product information and useful layout differences. They are not interchangeable capacities, and the table does not rank build quality. Retailer and manufacturer figures are identified rather than presented as our measurements.
| Product | Stated dimensions and weight | Why it is relevant | Buying reference |
|---|---|---|---|
| BAGSMART Soar 25L Set | 43 x 26 x 23cm; 550g | 180-degree main opening and a detachable toiletry bag | See Soar 25L details |
| BAGSMART Blast 28L | 42 x 31 x 20.5cm; 0.9kg | Clamshell main access plus separate laptop access | See Blast 28L details |
| Osprey Daylite 26+6, Case Luggage black listing | 43 x 33 x 16cm; 0.84kg, unexpanded | Suitcase-style opening with optional extra capacity | Check Daylite listing and stock |
The black Daylite listing was sold out when checked on 11 October 2026. Osprey’s product information supplies the access and expansion description; the dimensions above follow the identified Case Luggage listing. Confirm the edition and current specification before ordering. [7] [8]
Choose between the examples by the task
The Soar 25L is worth inspecting when you want a relatively light, broad-opening bag, but its depth is a poor starting point for a strict 20cm allowance. By comparison, the Blast 28L offers a more compartmentalised travel layout; check whether those divisions suit your belongings. Meanwhile, the Daylite 26+6 is a flexible-capacity comparison, not a currently confirmed black-stock recommendation.
None of those descriptions proves personal comfort or long-term reliability. Before paying, examine how far the main zip opens, whether a packed laptop changes the chamber shape and how the bag behaves when you remove one large organiser. A useful product match is more specific than the word ‘clamshell’.
Top-loading alternatives and hybrid access
A lid-based daypack can suit mixed travel
The Skule Top 26 provides a concrete top-loading comparison: a fixed lid, raised padded device sleeve and stated 50 x 30 x 18cm dimensions at 750g. It demonstrates the form without being presented as a free personal item for the small allowances above. Its height alone is an obvious point to compare with your booking. [3]
The Osprey Sportlite 30 S26 is another top-loading example, with a cinch closure, lid flap and adjustable harness. Its current published dimensions are 55 x 30 x 28cm. That is a hiking-led shape, not a compact underseat alternative simply because the capacity sounds close to a travel backpack. [9]
Compare the workflow, not an imagined category winner
A daypack chosen for walking after arrival may justify a layout that is less convenient for packing folded clothing. Conversely, a short-break bag may spend more time being opened at accommodation than worn on trails. Write down which part of the trip is more demanding and choose the compromise consciously.
You can also use a broad-opening travel bag with a small day pouch, or a top-loader with a simple clothing bundle. However, account for the total weight and space of that system. Adding multiple organisers to compensate for an unsuitable opening can erase the apparent advantage of choosing a smaller or lighter bag.
Organisers can improve access or make it worse
Match the organiser to the aperture
A cube that sits neatly inside a bag can still be awkward to remove through a narrow top opening. Check its packed width and depth at the mouth, particularly if a laptop sleeve or drawcord channel reduces the usable opening. Soft corners help only when you are not relying on force to push the whole bundle through.
For a broad-opening chamber, two smaller cubes can preserve flexibility around unusual objects. One large cube can be quicker to remove but may leave you with no convenient route to a pouch underneath. The correct arrangement depends on how often you need to retrieve individual items rather than unpack everything at once.
Do not turn compression into a requirement
The six-piece BAGSMART cube set can be compared as a grouping option, but you need not carry every piece. A complete set may include sizes or functions that are unnecessary for a compact backpack. Select only what solves an actual organisation problem and check the current set configuration before buying.
You should still be able to close the main bag without straining it. Compression removes some trapped air from suitable clothing; it does not remove the mass of the contents or make a rigid laptop smaller. An organiser system that creates a hard, overfilled block can make both a top-loader and a clamshell less comfortable.
Work through three trip scenarios
A two-stop city break with clothing changes
Imagine arriving late, taking out one clean outfit and leaving early the next morning. A broad-opening pack lets you see the clothing groups quickly without transferring everything to a wardrobe. Keep the used-clothing bag accessible so it does not become a loose bundle across the top by the second day.
For that workflow, the Soar layout is a reasonable reference to inspect. The decision still depends on dimensions, carry comfort and whether the small toiletries bag is useful to you. A hotel-friendly opening is not enough reason to buy a bag that exceeds the allowance you intend to use.
An active day after a rail transfer
Now picture a pack containing a weather layer, lunch, water and a small camera rather than several clothing cubes. A top-loader with good external pockets can keep the next-needed layer close to hand. You may value an appropriate harness more than a large opening that will rarely be used that day.
Keep the rail-transfer essentials in a separate accessible pocket and secure loose straps before stowing the bag. Do not assume that a hiking-style bag needs to be filled to its full height. Its useful capacity is the load you can manage while still retrieving the items you need along the route.
Work equipment plus a short overnight kit
A separate device compartment can reduce disruption when you need the laptop while the clothing stays packed. The Blast 28L layout illustrates this approach. Check the actual device fit, not only the advertised screen size, and confirm whether chargers have a place that does not bulge into the clothing chamber.
A broad laptop panel is helpful only when the rest of the bag remains manageable. Try taking the computer out with the clothing section packed and the bag safely supported. If this requires opening several unrelated pockets or spreading the pack across a large surface, the advertised separation may be less convenient than it sounds.
Carry out a fair home comparison
Use the same kit and the same tasks
When a seller permits a suitable trial, pack the same items in each candidate. Do not give the top-loader a loose pile while the clamshell receives carefully fitted organisers. Equally, do not force identical cube arrangements into differently shaped bags. Keep the contents the same while arranging them sensibly for each design.
Complete a short sequence: retrieve the next-use layer, find your cable, remove the device if relevant, and replace each item. Note what had to move and whether you needed a clean surface. A written account of those small frustrations is more useful than an invented overall score based on appearance.
Keep the purchase trial distinct from extended use
Preserve labels and packaging, avoid dirty outdoor surfaces and ask before a prolonged loaded trial. Necessary inspection and real-world use are not automatically treated the same way under return terms. A short home comparison should not become an unannounced weekend trip followed by a claim that the bag was merely examined. [10]
If you notice a damaged zip, failed stitching or an uncomfortable hard edge, record it and contact the seller rather than modifying the bag. Replacing a buckle or removing a divider before deciding whether to keep it can make both the product and the return discussion more complicated.
Look beyond the opening to the closure you must operate
Check access when the bag is comfortably full
An empty zip is easy to demonstrate. The more useful question is whether you can close the compartment with your intended kit inside without drawing two heavily strained sides together. Arrange the contents first, then operate the closure normally. If you need to kneel on the pack or pull a zip around a hard corner under tension, reduce the load rather than treating the resistance as proof that the bag needs breaking in.
On a lid-based pack, check that the closure sits properly over the mouth and that the straps remain within a useful adjustment range. A lid perched above a swollen load is not the same configuration as the tidy pack shown online. With a roll-top, follow the required rolling and fastening instructions instead of leaving it partly open to create extra space.
Avoid unsupported durability predictions
It is tempting to count zip length and declare one design more reliable. That skips the quality of the components, the way the bag is constructed and how it will be used. A long, well-supported opening and a short, overstressed opening cannot be ranked simply by the amount of zip between them. This comparison does not make a universal durability claim for either category.
For a candidate you may keep for years, ask what happens if a closure needs attention. Look for clear care instructions and a credible support route, then read the relevant warranty exclusions. Do not assume that a long guarantee means every worn zip, accidental tear or airline incident is covered. Product support is a separate buying criterion from the convenience of the opening.
Pack for the second morning, not only for departure
Allow the arrangement to change during the trip
The first packing session is unusually tidy. Clothing is clean, small items are in their assigned pouches and nothing has been bought along the way. After one night, your kit may include a used shirt, a partly dry towel or a cable that was packed in a hurry. A workable opening should support that slightly less perfect routine without requiring you to rebuild the whole bag every morning.
Try a simple rehearsal: remove the outfit you would use first, put it aside, then return a similarly sized used-clothing bundle to the system. Do not put damp fabric against electronics or seal wet items away for prolonged storage. The point is to reserve a sensible separation method, not to pretend that every condition on a real trip will be as neat as the initial layout.
Preserve the next-use items
In a top-loader, the used-clothing bundle must not become a new obstacle above the item you need repeatedly. In a clamshell, avoid spreading miscellaneous items across both halves merely because the space is visible. Keep one predictable access route for the layer, documents or cable that you will need before the next overnight stop.
This is where a smaller, simpler kit can outperform a bigger compartmentalised system. Reducing one unnecessary pouch may give you room to retrieve the important one cleanly. Before buying a larger bag, check whether the frustration comes from the amount of kit, its arrangement or the opening itself. Those are different problems with different solutions.
Compare a partly filled bag as well as a full one
Your daypack load may be smaller than your travel load
A backpack that carries clothing between hotels may later hold only a bottle, a layer and a few small items. Consider whether it remains manageable with that lighter load. A rigid divided layout can keep its footprint even when partly empty, while a softer chamber can lose shape. Neither behaviour is automatically wrong, but it changes how the bag rests and how easily you find things.
Use the adjustment features as intended rather than folding the frame or forcing the body into a new shape. Check that reduced contents do not leave hard objects moving around freely. A simple small pouch may control a few loose accessories better than a large organiser with mostly empty compartments.
Check the open bag’s balance
When a clamshell has one heavily loaded half and one nearly empty half, opening it on a narrow surface can be awkward. Support it appropriately and see where the weight sits. If the laptop compartment is attached to the opening panel, take extra care that the panel is not left hanging from a chair or luggage rack.
A top-loader can also become awkward when a dense object sits high in an otherwise light bag. Reposition the contents sensibly rather than assuming the tall shape is the cause. The useful observation is whether the design gives you an easy way to keep the actual load controlled, including on the days when you are not carrying all your clothing.
Ask four concrete questions before paying
Request a demonstration of your access problem
Ask to see the main clothing chamber fully open, then ask for the laptop or device compartment separately. Next, establish whether you can reach a small essentials pocket while the main chamber remains closed. Finally, ask which published dimensions apply to the bag unexpanded, expanded or properly rolled. These questions are more useful than asking whether the bag is simply ‘good for travel’.
Where a retailer cannot answer, keep that uncertainty in your decision rather than assuming the most favourable interpretation. A missing measurement or ambiguous photograph does not become evidence merely because several other shops repeat the same description. Choose another candidate or wait for clarification when that information is central to your route.
Decide which compromise you are willing to accept
You might accept a larger opening footprint in exchange for easy clothing organisation. Alternatively, you might accept removing one pouch from the top in exchange for a harness that suits your walking plans. Write that compromise down in a sentence. It prevents you judging the bag against a different purpose after the first minor inconvenience.
The aim is not a design with no compromises. It is a design whose disadvantages occur infrequently or are easy to manage in your own routine. A bag that wins on someone else’s hotel-packing method can still be the wrong choice for your standing train transfer and day-long walk.
Pros, cons and common buying mistakes
Practical strengths
- Clamshell access makes clothing groups visible.
- Top access can work well for a layered day kit.
- Separate pockets can preserve access in either design.
Limits to keep in mind
- A broad opening needs a suitable surface.
- A buried item can be awkward in a top-loader.
- Opening style does not prove comfort, protection or airline fit.
Where clamshell designs usually earn their place
The main strengths are visibility, straightforward clothing organisation and the ability to assess the whole packing area. A full opening can also make it easier to clean out loose debris after the trip, provided you follow the care instructions. The limitations are the open footprint and the possibility that accessing one item exposes more of the contents than you intended.
Common mistakes include choosing by an empty flat-lay photograph, ignoring the device panel’s effect on depth and buying the largest cube that fits the chamber. Another is assuming that broad access removes the need for quick-access pockets. You still need a plan for retrieving small items while the main bag remains closed.
Where top-loaders can be the better compromise
A top-loader can suit a compact, layered kit and a journey where you often access the bag while upright. The design can leave one continuous main chamber for awkward shapes. Its limitations become more noticeable when the lowest items are needed repeatedly, or when a narrow opening makes it difficult to remove a packed organiser.
Do not assume that every top-loader is lighter, stronger or more weatherproof. Those are separate properties that need evidence for the exact product. Likewise, a side zip is not automatically a full solution: check where it opens and whether the compartment behind it remains reachable once the bag is properly loaded.
Frequently asked questions
Is a clamshell backpack always better for travel?
No. It is often convenient for arranging clothing, but travel includes queues, walking, public transport and confined spaces as well as packing at home. A top-loader can work better for a layered day kit or a pack that will mainly be used for walking after arrival. Compare the complete access arrangement, the harness and the packed dimensions rather than choosing from the label alone.
Are clamshell and panel-loading backpacks the same thing?
Retail descriptions overlap, and the terms do not reliably describe an identical opening. Some panel-loading bags expose most of one deep chamber, while some clamshell bags divide the contents into two separate halves. Look at the actual main-compartment zip and photographs. Describe what you need to reach and how much of the chamber must be exposed, rather than relying on a category word.
Do top-loading backpacks always require packing cubes?
No. A simple layered arrangement may be sufficient, especially for a weather layer, lunch and a few day-trip items. Organisers help when they group items or make retrieval easier, but they can also become awkward blocks at a narrow opening. Try your existing pouches first and make sure a filled organiser passes through the mouth without force. More compartments are not automatically better organisation.
Can I use a hiking top-loader as cabin luggage?
Only when the exact packed bag meets the allowance included in your booking and any other relevant conditions. A small-sounding litre label does not guarantee a short or shallow bag. Hiking packs can have tall frames, substantial belts or protruding pockets. Measure the actual configuration and recheck your carrier’s current rules. Do not rely on a reviewer’s successful flight with a different airline or fare.
Does an opening-flat laptop section mean I can leave the laptop inside at security?
Do not assume that. Follow the instructions at the airport and checkpoint you are using. A laptop compartment that opens flat may be convenient, but its design does not override security procedures or a staff request to remove equipment. Pack so that removal is straightforward when required, and avoid burying cables or documents in a way that makes repacking difficult.
Is a roll-top backpack automatically waterproof?
No. The closure is only one part of the system. Fabric, seams, other openings and correct use all matter, and water-resistant wording is different from a specified immersion claim. Check the whole product’s stated protection and limitations. Keep sensitive electronics appropriately protected and avoid treating an attractive roll-top design as evidence of performance that the manufacturer has not established.
What is the simplest way to decide between the two?
Pack your intended essentials and perform the tasks you expect to repeat: retrieving a layer, removing a laptop and finding a small accessory. Then consider where you will open the bag and how far you will carry it. Choose the design that makes those tasks manageable without exceeding your allowance. A modest access advantage is not worth an uncomfortable harness or an unsuitable packed size.
The recommendation: choose your retrieval routine first
Start with a clamshell when organised clothing and easy overview are central to the trip. Start with a top-loader when a vertical day kit, useful upper pockets and the intended carrying system better match your plans. Then check dimensions, comfort and weather-protection claims separately. Do not ask the opening style to answer questions it cannot answer.
The strongest choice is the bag you can use without repeatedly unpacking the wrong items or fighting an awkward carry. A few deliberate retrieval tasks with a realistic kit tell you more than the number of zips in the marketing photographs.
Sources and fact-checking notes
Sources reviewed on 11 October 2026. Product dimensions and features are published specifications, not measurements from samples tested for this guide. Practical routines, comparisons and scenarios are editorial judgement. Check the selected product version, current offer and relevant travel rules before buying or travelling.
- BAGSMART UK: Blast 28L Travel BackpackManufacturer dimensions reordered as height x width x depth: 42 x 31 x 20.5cm; 0.9kg. Generic underseat marketing is not airline-specific approval.
- BAGSMART UK: six-piece compression packing cubesExact supplied-style UK product destination; compare the currently selected set and dimensions. The selected Light Blue set was notification-only on the review date. No claimed percentage saving is adopted.
- Fjallraven UK: Skule Top 26Top-loading design, 50 x 30 x 18cm, 750g and fixed lid. Device-sleeve fit must be checked against actual device measurements.
- BAGSMART UK: Soar 25L Backpack SetCurrent destination after the old product URL redirected. Stated 43 x 26 x 23cm, 550g and 180-degree opening; includes a separate 1L toiletry bag.
- Ryanair Help Centre: bag policySmall personal bag 40 x 30 x 20cm; Priority and 2 Cabin Bags includes an additional 55 x 40 x 20cm, 10kg cabin bag. Recheck the actual booking before travel.
- easyJet: cabin bagsSmall underseat allowance 45 x 36 x 20cm; larger paid/included allowance 56 x 45 x 25cm, subject to booking conditions. Published maximum 15kg per cabin bag and self-lifting requirement.
- Osprey UK: Daylite 26+6 Expandable Travel BackpackSuitcase-style main opening, expansion and carry-system reference. Inspect the centimetre specification and the precise edition before buying.
- Case Luggage: Daylite 26+6, black 10006130Retailer lists 43 x 33 x 16cm and 0.84kg unexpanded. Black was sold out when checked; this is a comparison listing, not a confirmed immediate offer.
- Osprey UK: Sportlite 30, S262026 one-size top-loading edition: 55 x 30 x 28cm, 1.02kg. Rounded kilogram weights are identical in the published table.
- GOV.UK: accepting returns and giving refundsUK trader guidance on cancellation, necessary handling and faulty goods. General information, not a decision on an individual dispute.
Illustrations in this article were created for Taylor’s Trailblazing Travel Gear. Third-party photographs, where used, are credited beside the image or in the source list.